

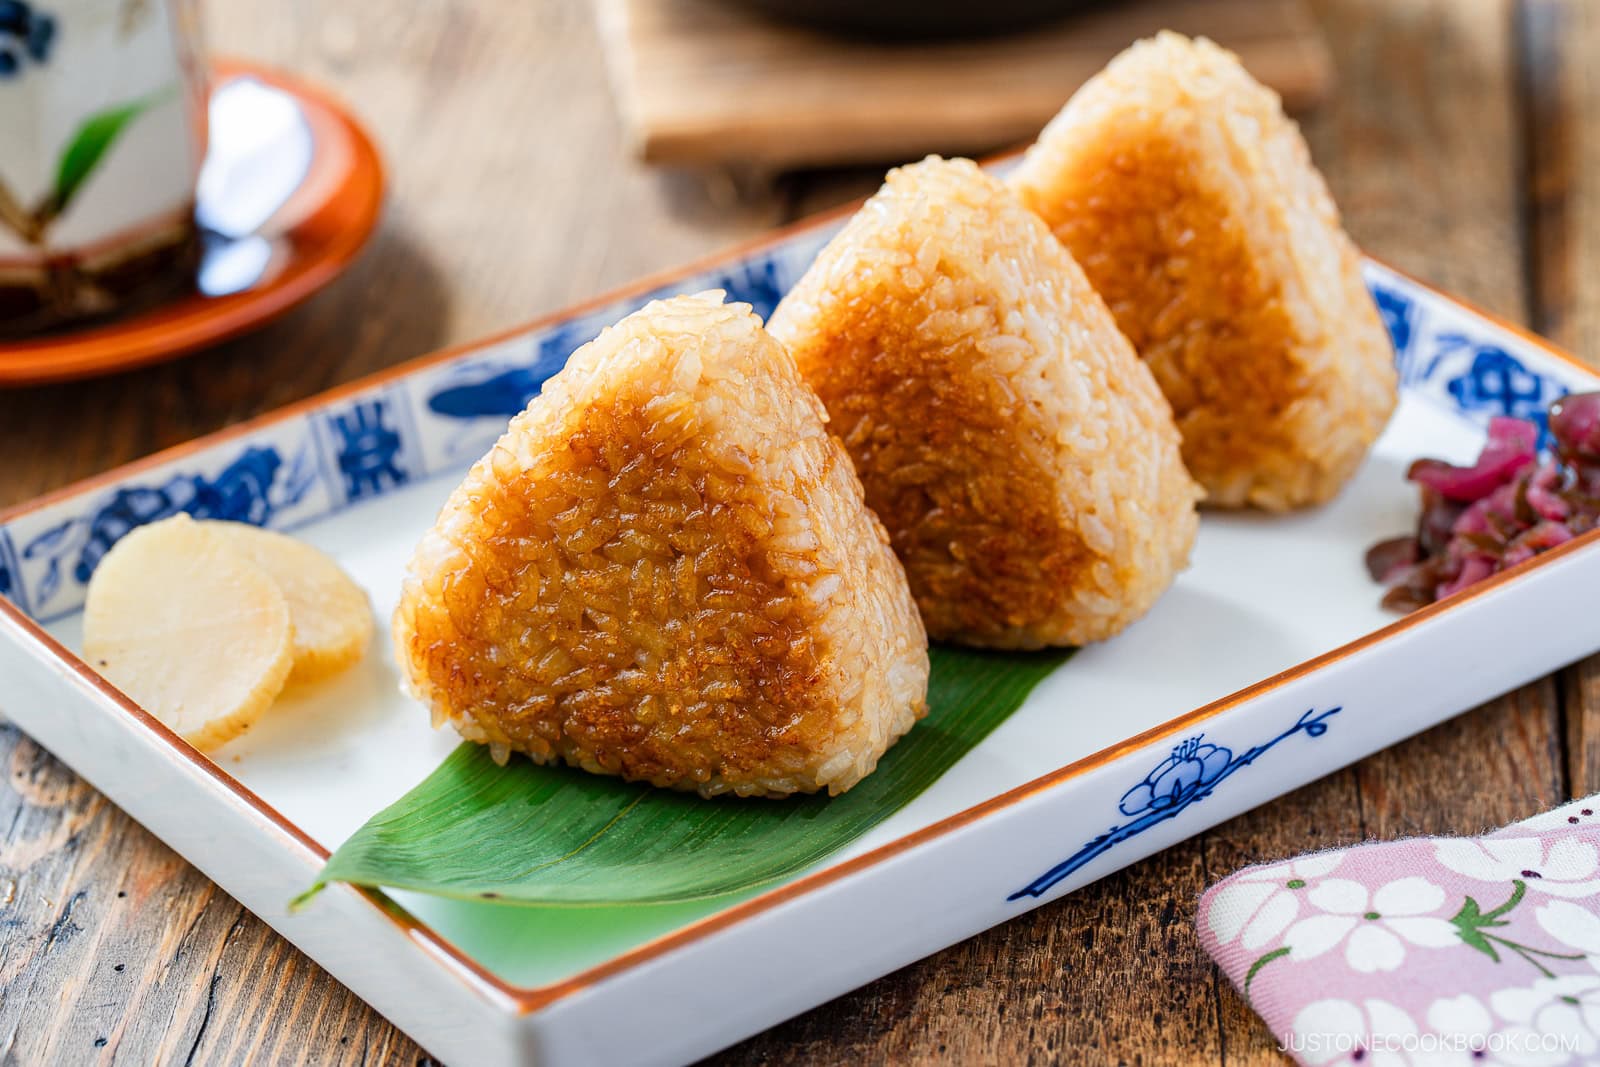
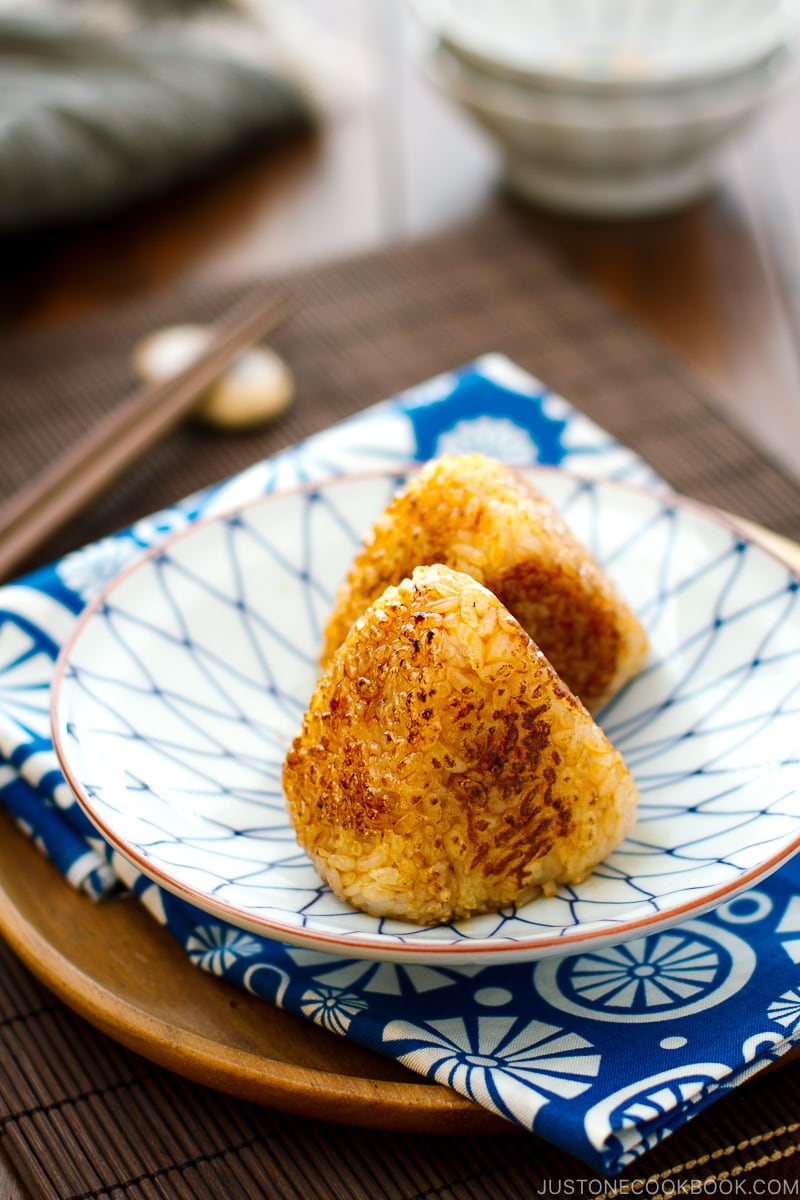
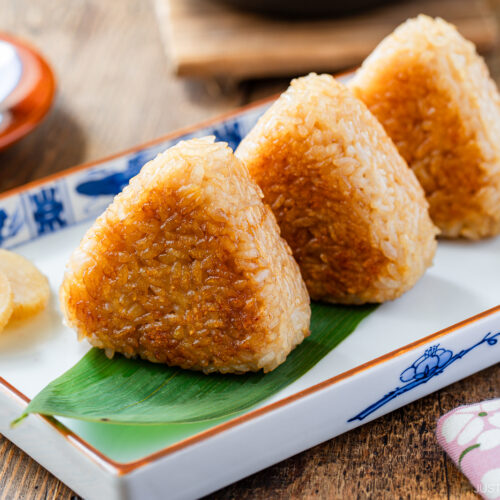
Yaki Onigiri (Grilled Rice Ball) (Video) 焼きおにぎり
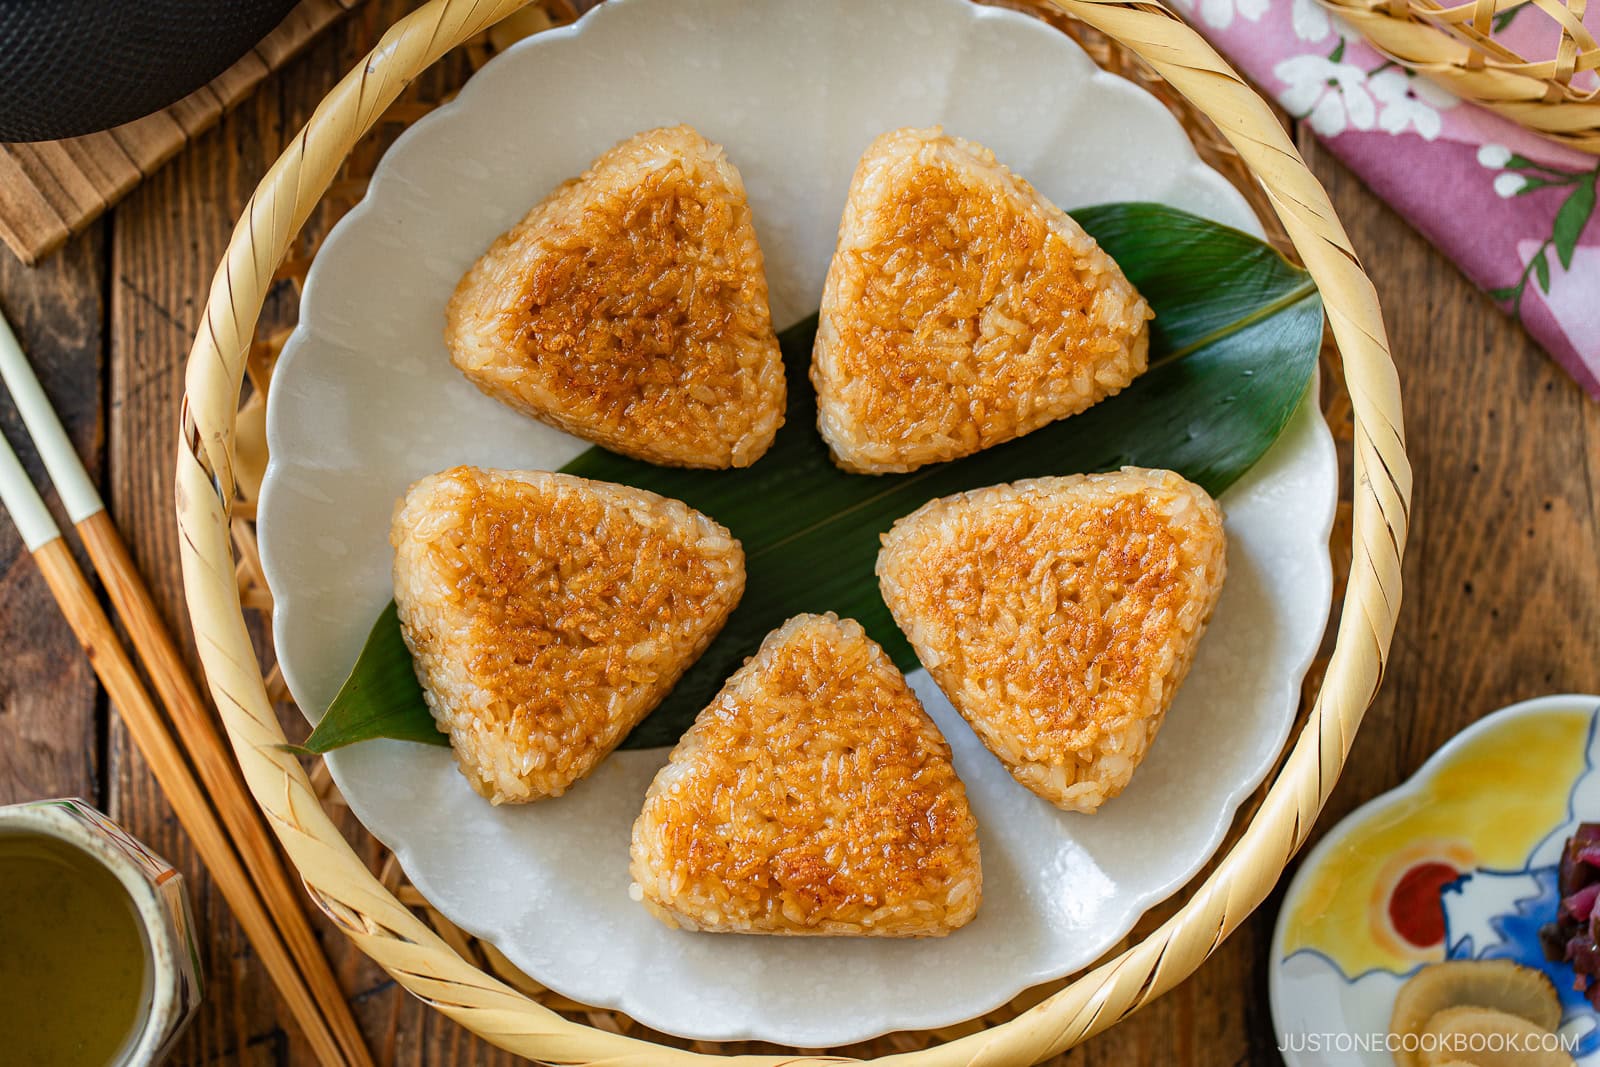
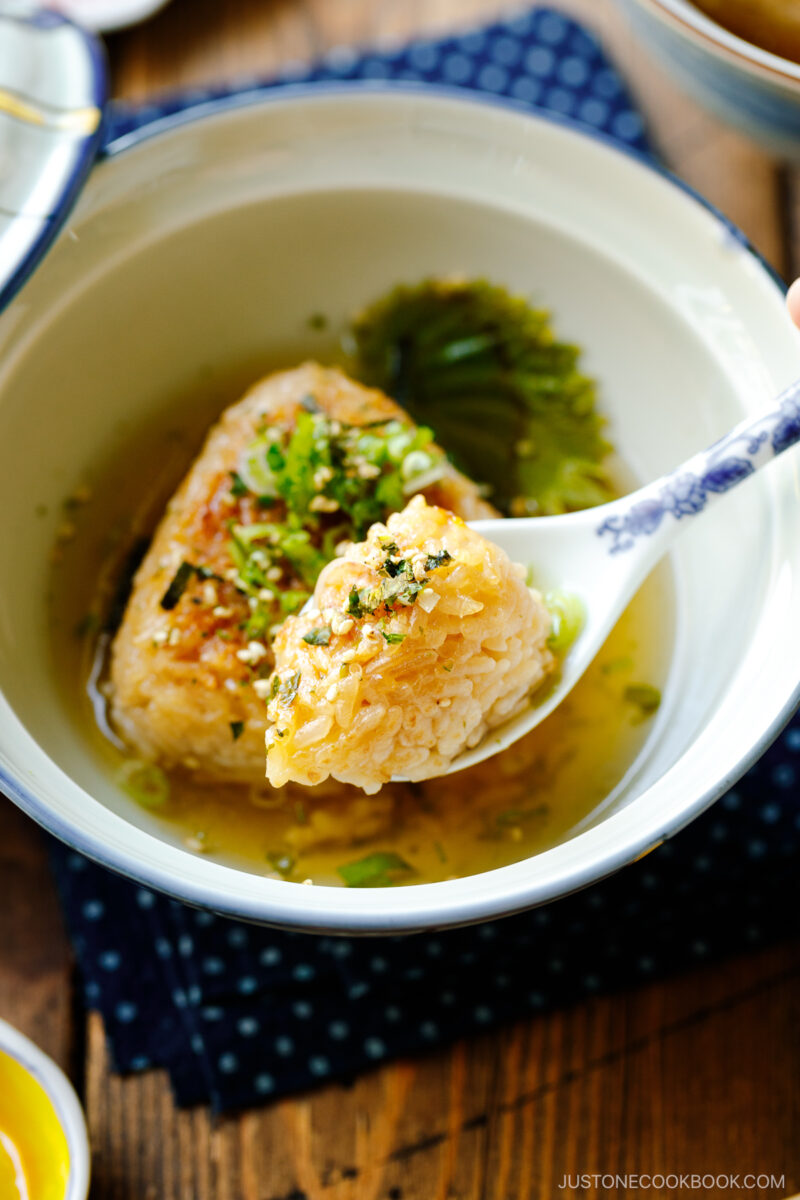
Golden, crispy, and brushed with a savory-sweet glaze, Yaki Onigiri (Grilled Rice Ball) turns humble white rice into an irresistible snack you’ll want on repeat.
Yaki Onigiri are the Japanese grilled rice balls I reach for whenever a simple bowl of rice won’t do. Pan-grilled until crackly, then lacquered with soy sauce and toasted sesame oil, each bite offers a crispy crust and a tender, steamy center. Today I’ll show you the easy stovetop method so you can enjoy these comfort-food classics at home anytime.
If you’re craving more Japanese rice ball recipes, try my Tuna Mayo Onigiri, Miso Yaki Onigiri, and classic Onigiri next!
What is Yaki Onigiri?
Yaki means “grilled,” while onigiri are Japanese rice balls. Traditionally cooked over charcoal, Yaki Onigiri (焼きおにぎり) pick up a golden brown, smoky crust, then receive a brush of soy or miso glaze that caramelizes the flavors on the surface. At home, we mimic the effect in a frying pan for the same crispy exterior and soft interior.
Why I Love This Recipe
- Crispy outside, tender inside
- Savory, caramelized glaze
- Easy to make in a frying pan
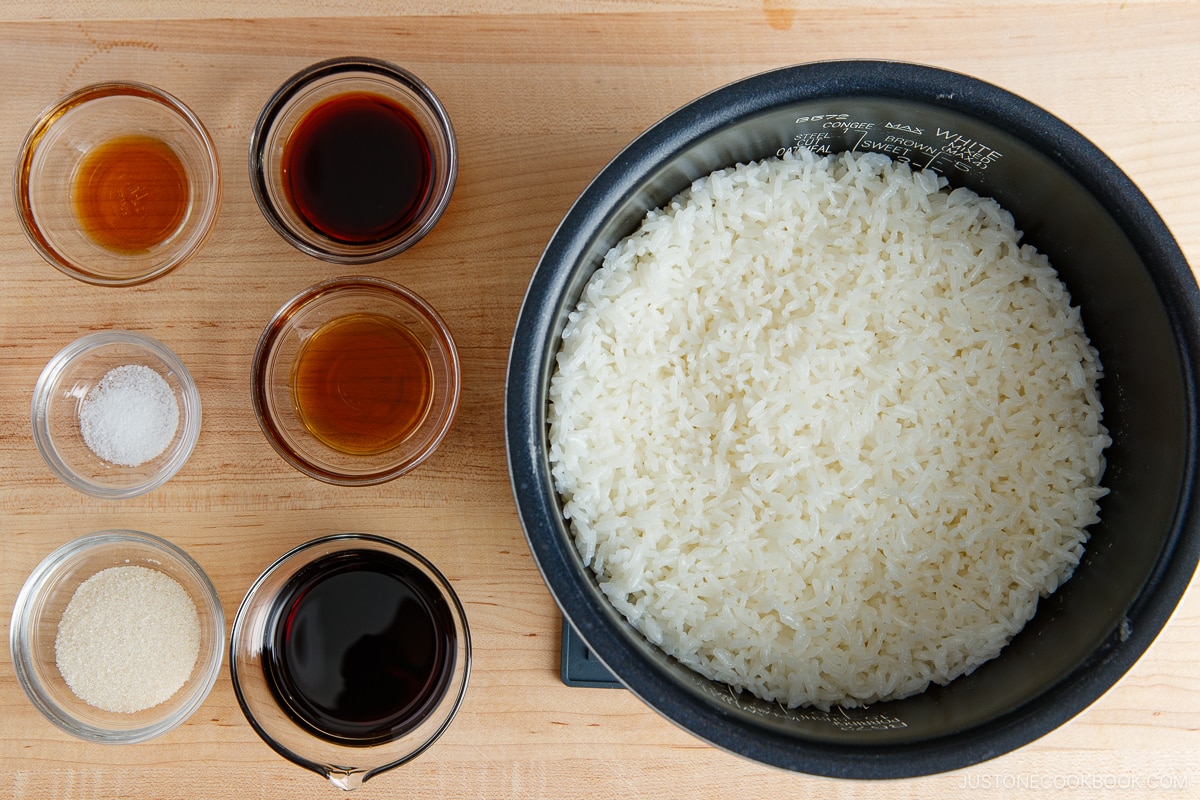
Ingredients for Yaki Onigiri
- Japanese short-grain white rice – uncooked
- Water
- Soy sauce
- Toasted sesame oil
- Sugar
- Kosher salt
Find the printable recipe with measurements below.
Substitutions
- Japanese short-grain rice: It’s often sold as “sushi rice” outside of Japan. Please do not substitute it with other varieties like jasmine, basmati, or other long-grain rice as the onigiri will fall apart.
- Soy sauce: Use tamari soy sauce for gluten-free.
How to Make Yaki Onigiri
Preparation
- Cook the rice and season. Rinse and soak for 20–30 minutes, then cook in a rice cooker, pot, Instant Pot, or donabe. While hot, stir in soy sauce, sesame oil, sugar, and salt. Slice gently to keep the grains intact.

- Shape. Moisten hands, use an onigiri mold, or use plastic wrap and form hot rice into a triangular shape.

Cooking
- Pan-grill. Place the rice balls on parchment-lined frying pan over medium-low heat. Grill, turning gently, until all sides are crispy and lightly browned.
- Glaze and caramelize. Lower the heat; brush soy-sesame glaze on the top and sides. Flip once the first side caramelizes, then brush the remaining side. Continue over low heat until both glazed sides turn glossy and golden.

- Serve. Enjoy immediately or cool for bento.
Nami’s Recipe Tips
- Cool the rice just enough to handle; it must stay warm so the grains adhere.
- Always moisten hands or molds to prevent sticking.
- Use parchment paper to keep the glaze from burning and the rice from sticking to the fry pan.
- Avoid overhandling the rice ball and flip them only after a crust forms to prevent breakage.
- Use low heat when glazing; high heat scorches the soy and sugar.
Variations and Customizations
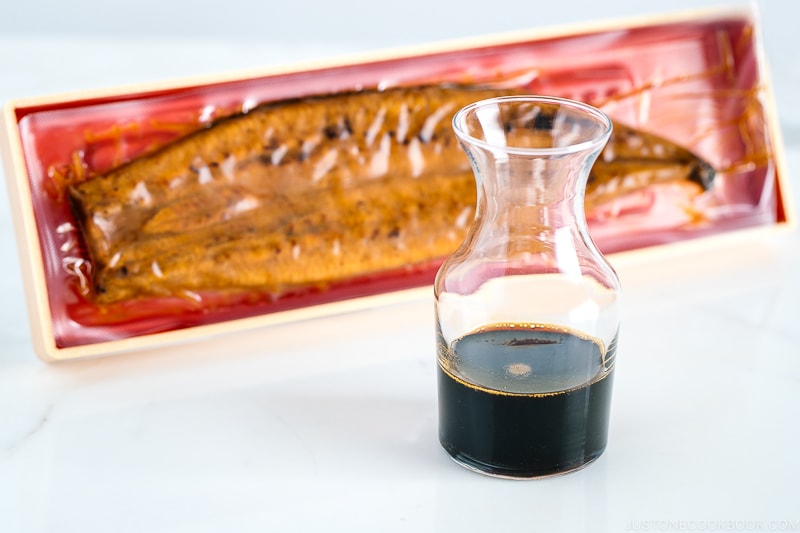
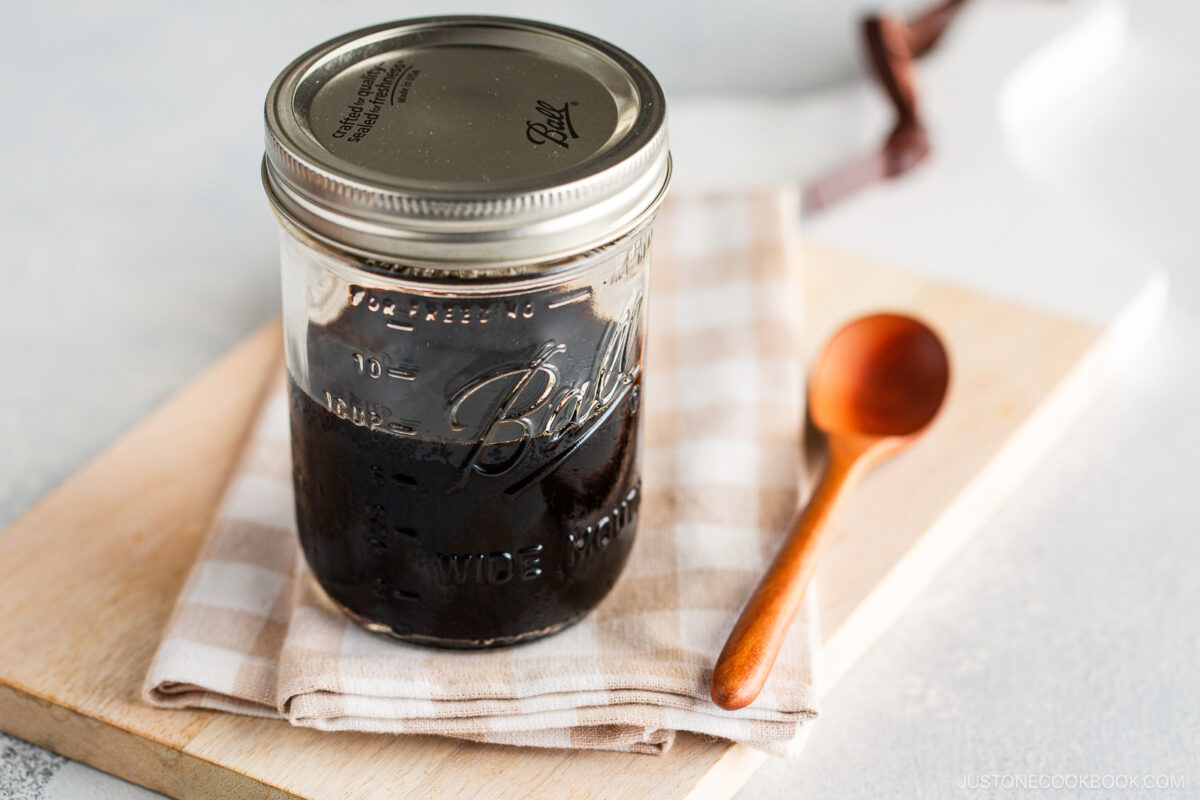
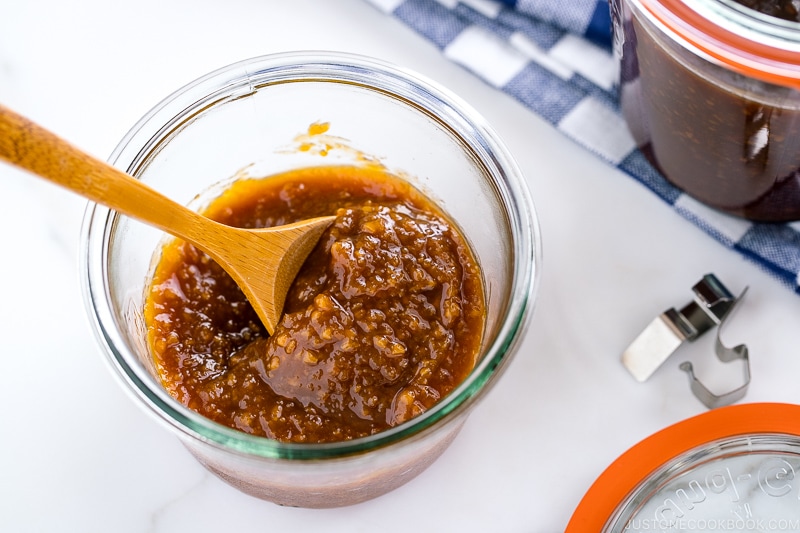
- Add a sauce – Brush with Homemade Eel Sauce (Unagi Sauce), Teriyaki Sauce, or Homemade All Purpose Miso Sauce right before serving.
- Wrap it with nori – Add a crisp piece of dried laver seaweed for texture and extra umami. Plus, it makes a convenient onigiri holder.
- Use plain rice – Skip the seasoning and make this yaki onigiri recipe with unseasoned rice for a classic taste.
- Fill it – Tuck in salted salmon, umeboshi, okaka, kombu, tuna mayo, or mentaiko.
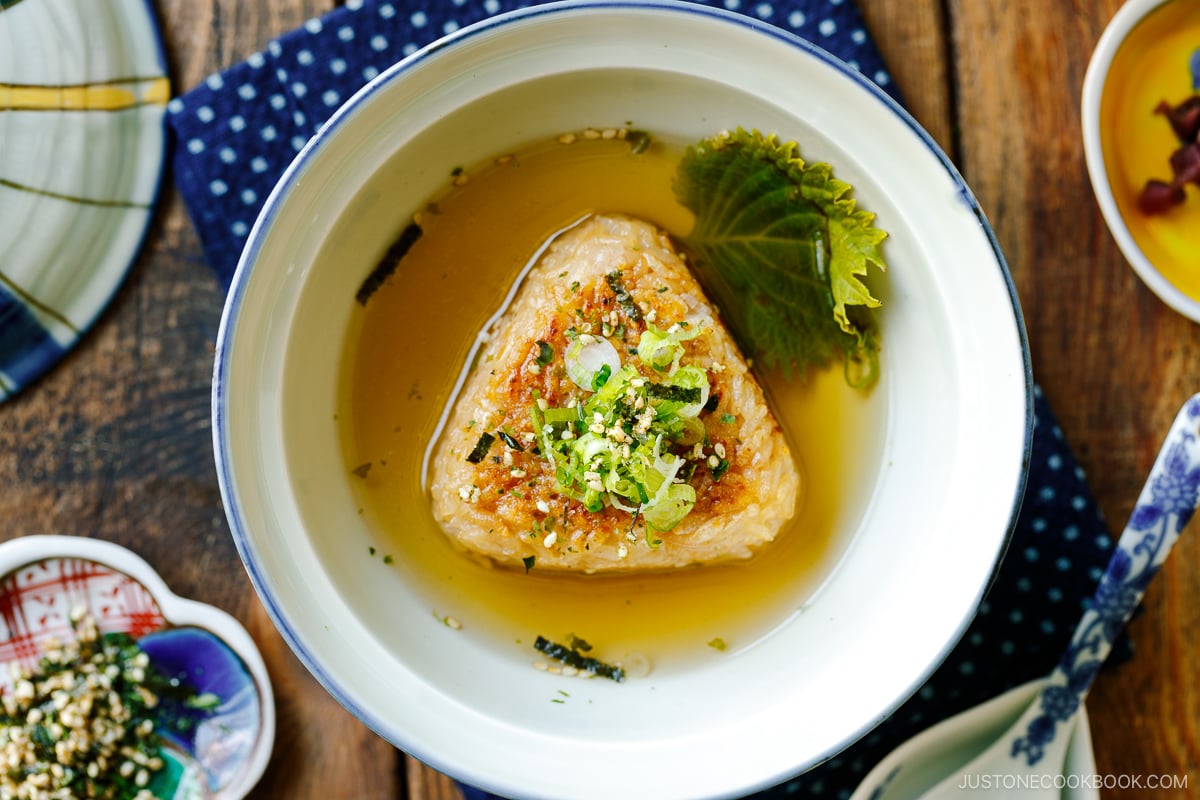
- Chazuke – Freeze extras, then pour hot tea or dashi over a grilled rice ball for quick Yaki Onigiri Chazuke.
What to Serve with Yaki Onigiri
- With chicken – Pair with juicy Karaage (Japanese Fried Chicken) for protein.
- With veggies – Try Yakitori-Style Grilled Vegetables for color, crunch, and fiber.
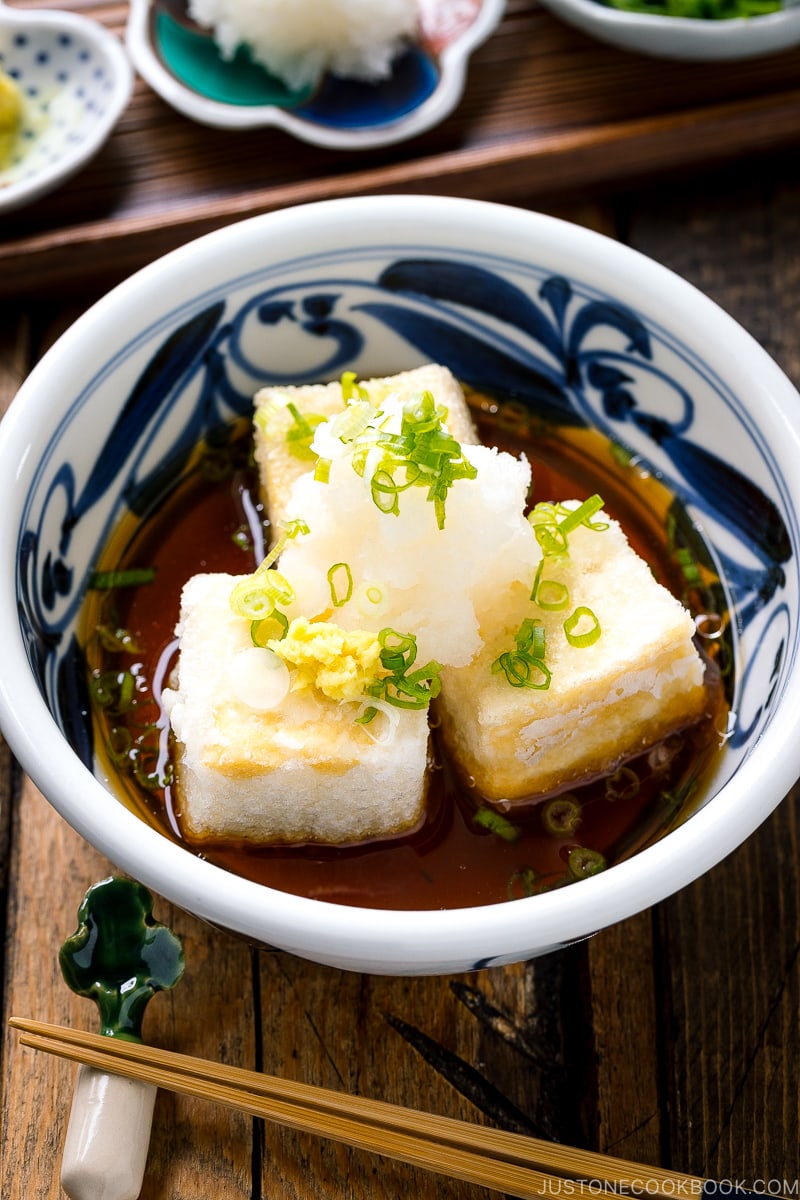
- With tofu – Crispy Agedashi Tofu complements the rice ball’s glaze.
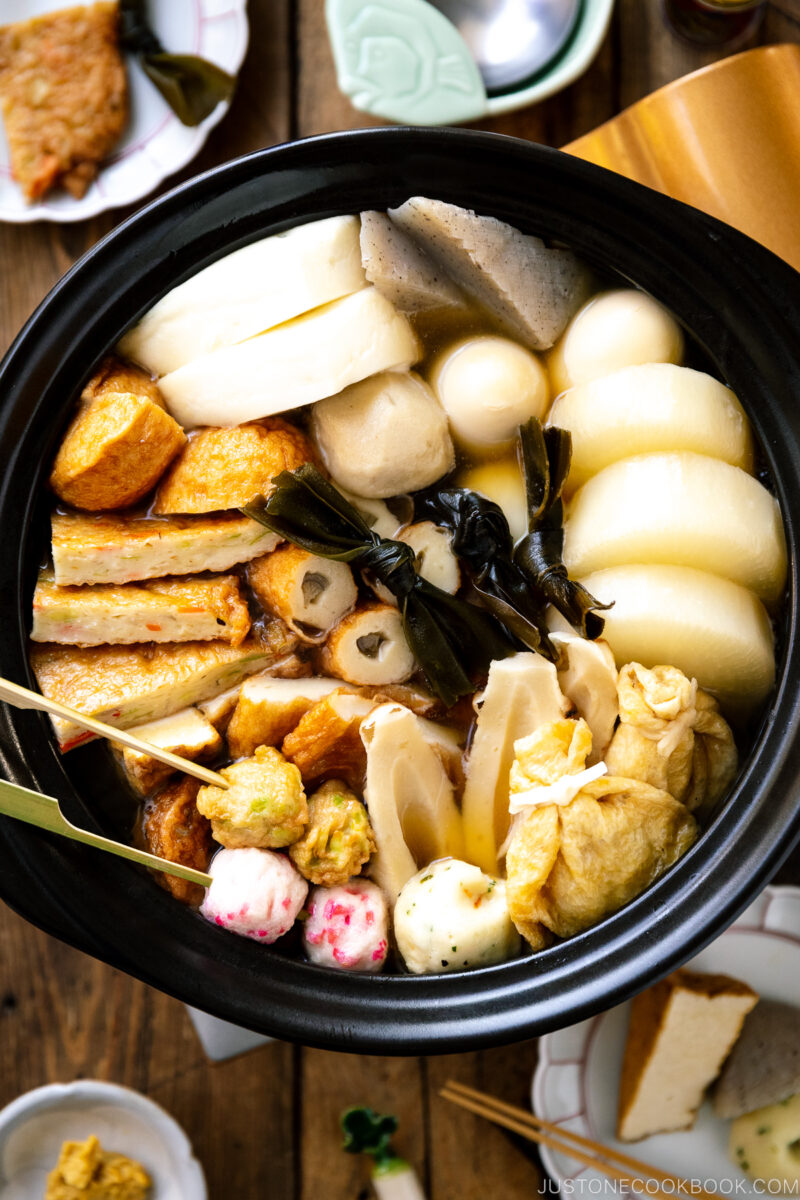
- With stew – Warm, comforting Oden rounds out a winter table.


Storage and Reheating Tips
To store: Wrap each cooled onigiri tightly in plastic and freeze up to 1 month. For short storage, refrigerate up to 2 days wrapped and covered with a thick kitchen towel to buffer the cold.
To reheat: Bring to room temperature, then warm in a microwave or re-grill gently in a pan.
Frequently Asked Questions
Can I use melted butter in the glaze?
Yes, you can. Butter burns easily, though, so take care not to let it burn.
Can I add mirin or sake to the rice seasoning?
I don’t recommend it. It’s not traditional, and extra moisture can keep the rice balls from holding shape.
Can I pack yaki onigiri in a bento box?
Yes! Cool them to room temperature before closing the lid on the airtight container to prevent condensation.
Yaki Onigiri (Grilled Rice Ball)
from votes Level up your Japanese rice balls with my tasty Yaki Onigiri (Grilled Rice Ball) recipe. I'll show you how to shape and pan-grill them with a savory soy glaze until they're golden and caramelized. With a crispy crust and tender interior, these grilled onigiri are truly irresistible! Print Pin
Video
Prep Time: 15 minutes Cook Time: 15 minutes Total Time: 30 minutes Servings: 9 rice balls
Ingredients US CustomaryMetric 1x2x3x
For the Steamed Rice
- ▢ 2¼ cups uncooked Japanese short-grain white rice (3 rice cooker cups, 540 ml for 9 rice balls; or cook 2 rice cooker cups (1½ cups, 300 g) of rice for 5 rice balls)
- ▢ 2½ cups water (or 1⅔ cups (400 ml) for 2 rice cooker cups)
For the Rice Seasoning
- ▢ 3 Tbsp soy sauce (or 2 Tbsp for 2 rice cooker cups)
- ▢ 1 Tbsp sugar (or 2 tsp for 2 rice cooker cups)
- ▢ 1 Tbsp toasted sesame oil (or 2 tsp for 2 rice cooker cups)
- ▢ ¼ tsp Diamond Crystal kosher salt (or ⅛ tsp for 2 rice cooker cups)
For the Glaze
- ▢ 1 Tbsp soy sauce
- ▢ 1 tsp toasted sesame oil
Japanese Ingredient Substitution: If you want substitutes for Japanese condiments and ingredients, click here. Cook ModePrevent your screen from going dark
Instructions
Before You Start…
- Japanese short-grain white rice requires a soaking time of 20–30 minutes. The rice-to-water ratio is 1 to 1.1 (or 1.2) for short-grain white rice. Please note that 2¼ cups (450 g, 3 rice cooker cups) of uncooked Japanese short-grain rice yield 6⅔ cups (990 g) of cooked white rice. This is enough for 9 onigiri rice balls (typically 110 g each). Optional: To make 5–6 rice balls, cook 1½ cups (300 g, 2 rice cooker cups) of uncooked Japanese short-grain rice in 1⅔ cups water (400 ml) to yield 4⅓ cups (660 g) of cooked white rice.
- Cook the rice; see how with a rice cooker, pot over the stove, Instant Pot, or donabe. To my rice cooker, I added 2½ cups water to 2¼ cups uncooked Japanese short-grain white rice. Once the rice is cooked, gather all the ingredients.
To Season the Cooked Rice
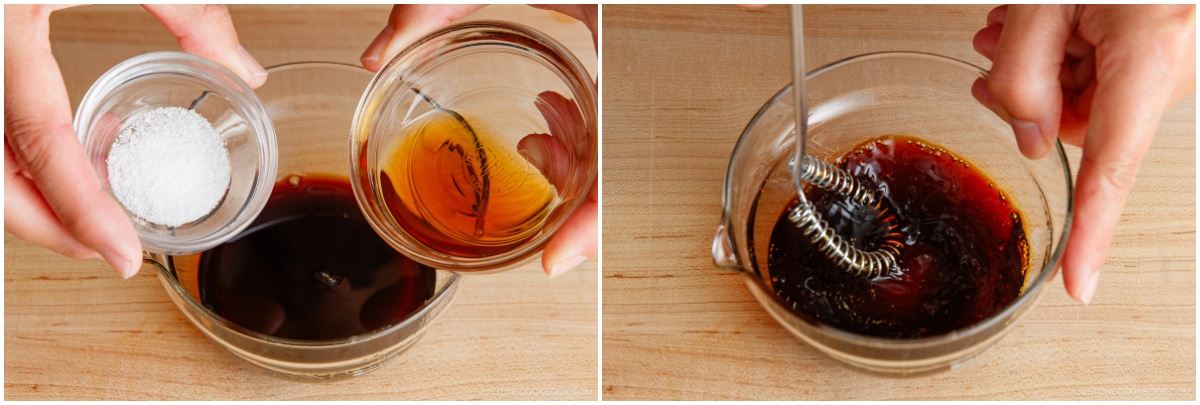
- Combine 3 Tbsp soy sauce and 1 Tbsp sugar in a small bowl and microwave until the mixture is hot, about 30–60 seconds. Whisk it all together until the sugar dissolves.
![Yaki Onigiri 1]()
- Add 1 Tbsp toasted sesame oil and ¼ tsp Diamond Crystal kosher salt and mix it all together.
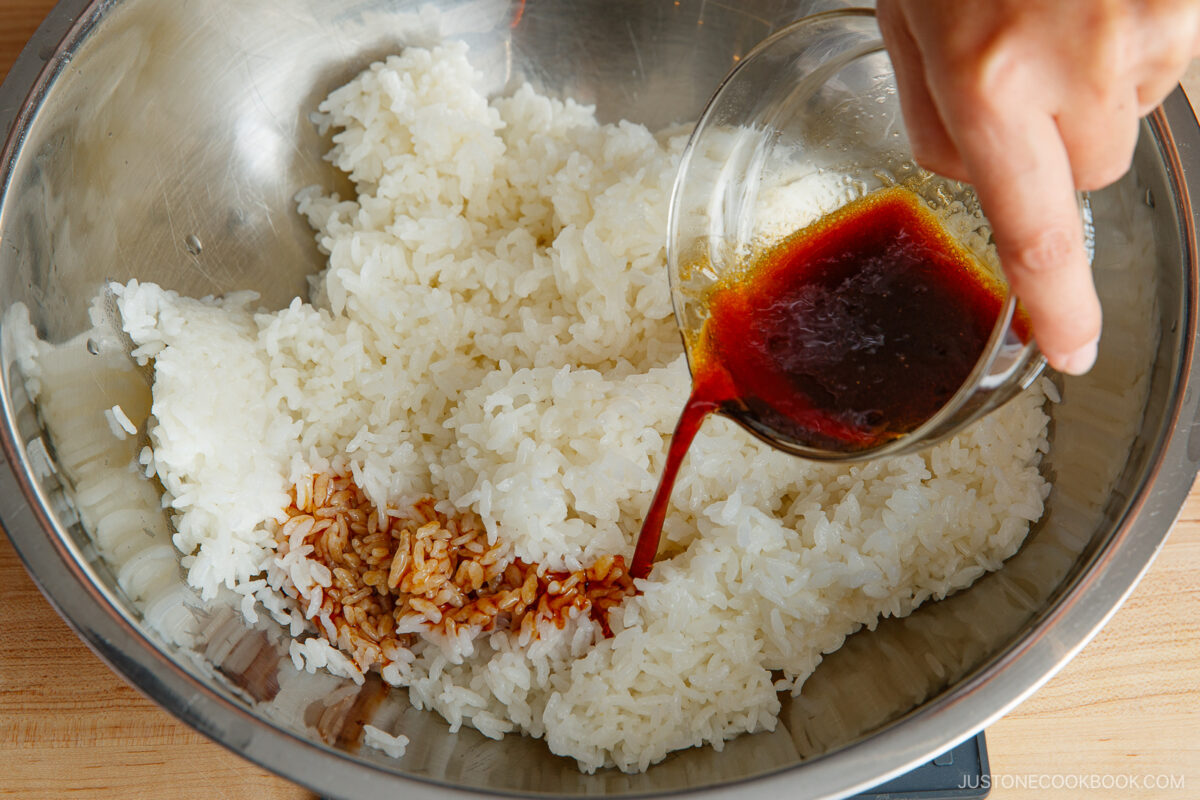
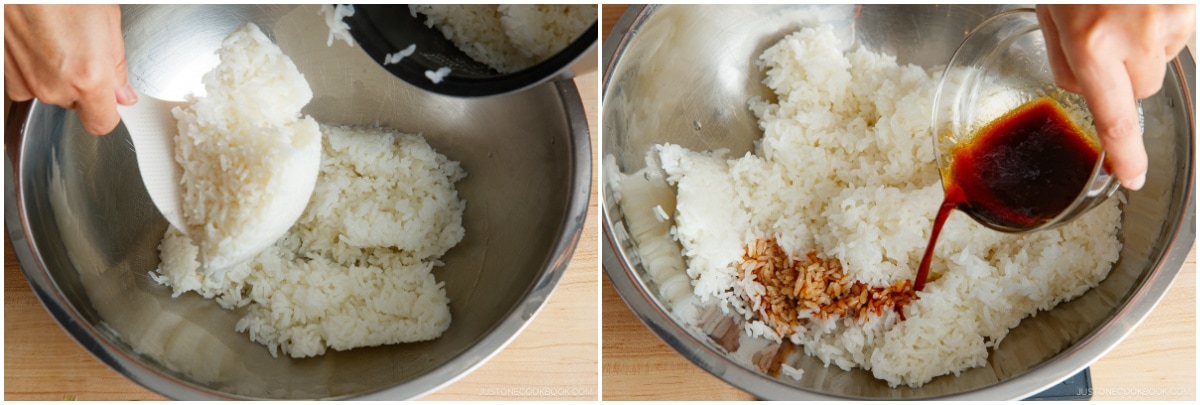
- Transfer the hot cooked rice to a large bowl and add the seasoning mixture.
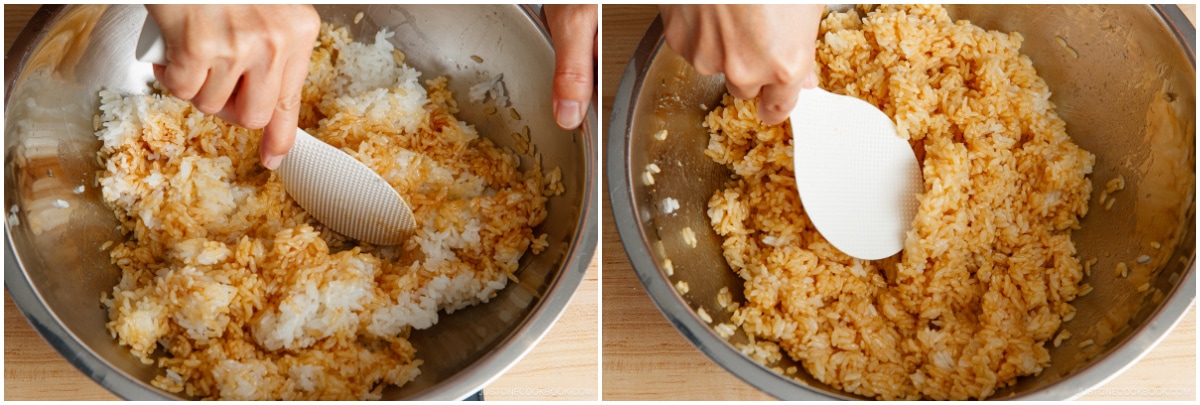
![Yaki Onigiri 3]()
- With a rice paddle, use a slicing motion to gently combine the seasoning and cooked rice well. Try not to mash the rice. Nami's Tip: Be sure to let the cooked rice cool a little bit until you can hold it without burning your hands. Rice must be hot or warm when making onigiri in order to hold its shape.

To Shape the Onigiri With a Mold
- Prepare a small bowl filled with water. Dip the onigiri mold and lid in the water to moisten so the rice doesn‘t stick to it. Remove the mold and drain the excess water.
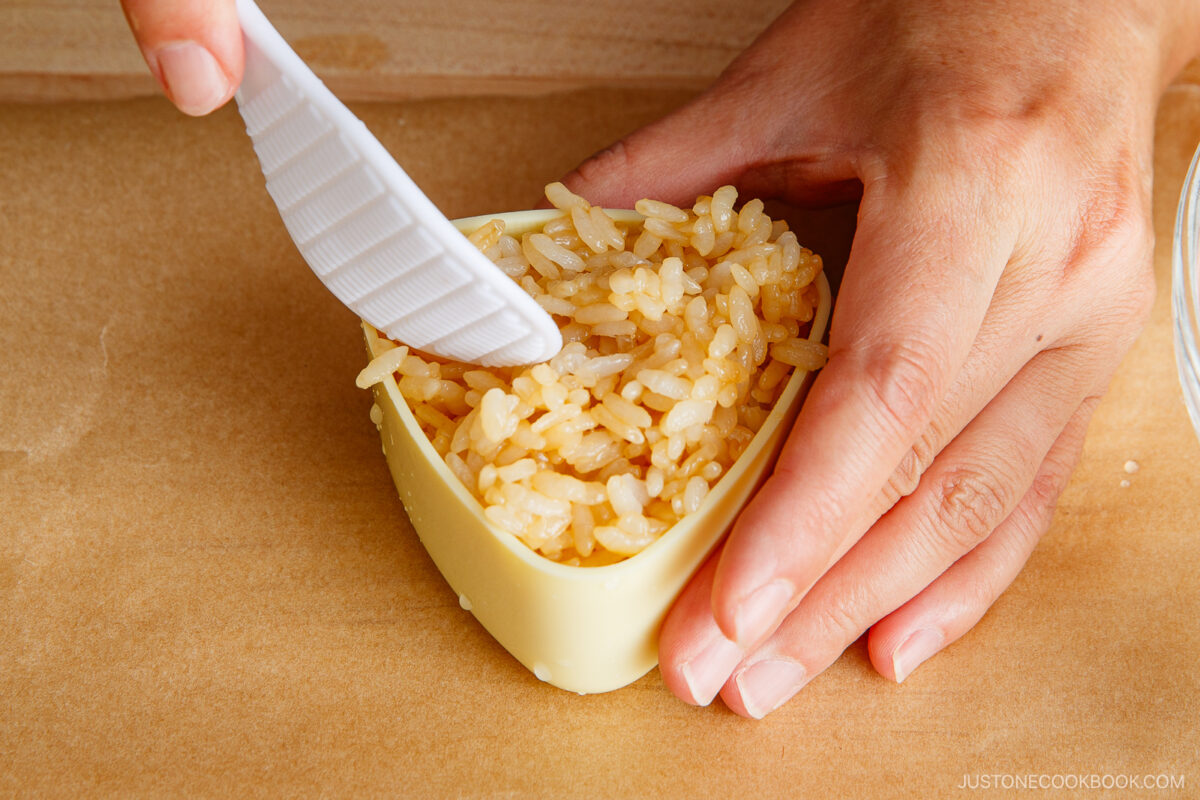
![Yaki Onigiri 5]()
- Fill the onigiri mold with the hot seasoned rice all the way to the top edge, making sure to fill the corners. Cover with the lid and push down firmly. You should feel a slight resistance; if not, add a bit more rice.
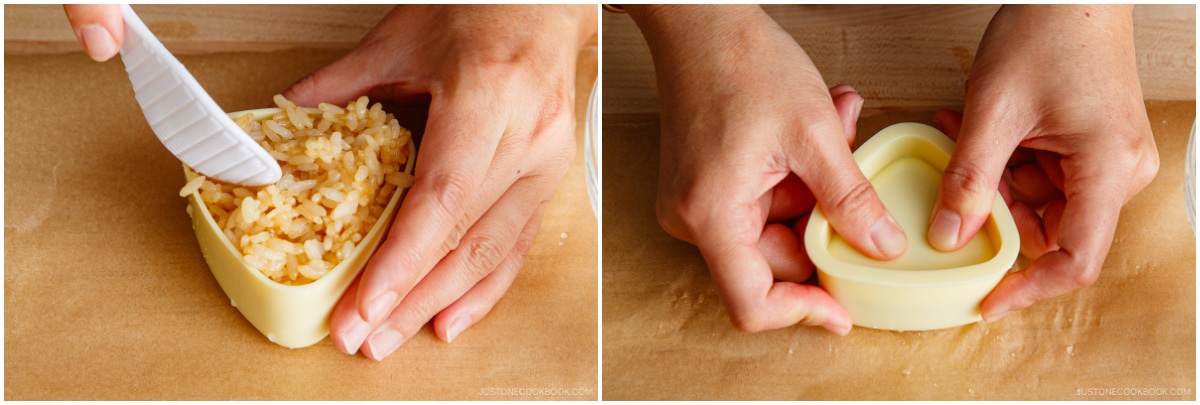
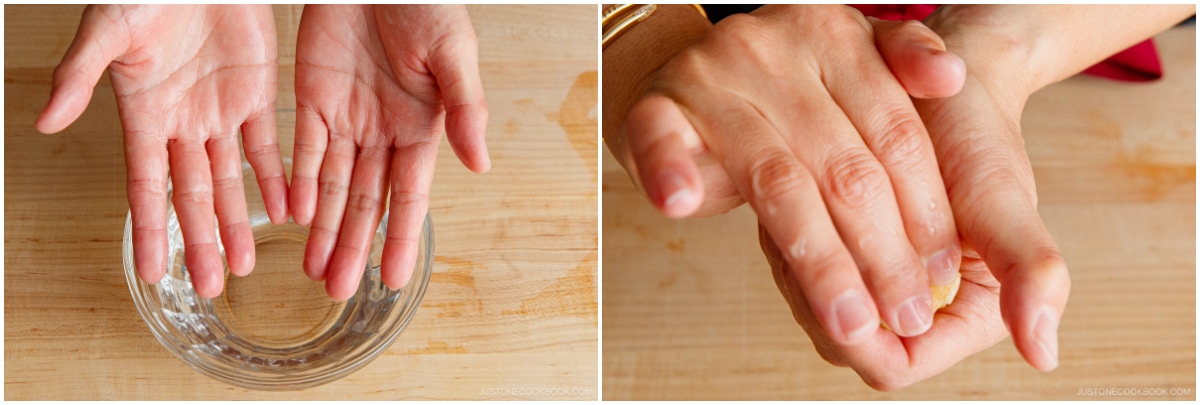
- Remove the lid. Flip over the mold onto a baking sheet or plate lined with parchment paper. Then, push the “button” on the mold‘s bottom to release your onigiri. Nami's Tip: Always dip your fingers in water before touching onigiri to prevent the rice from sticking to them.
![Yaki Onigiri 7]()
- Repeat with the remaining rice.
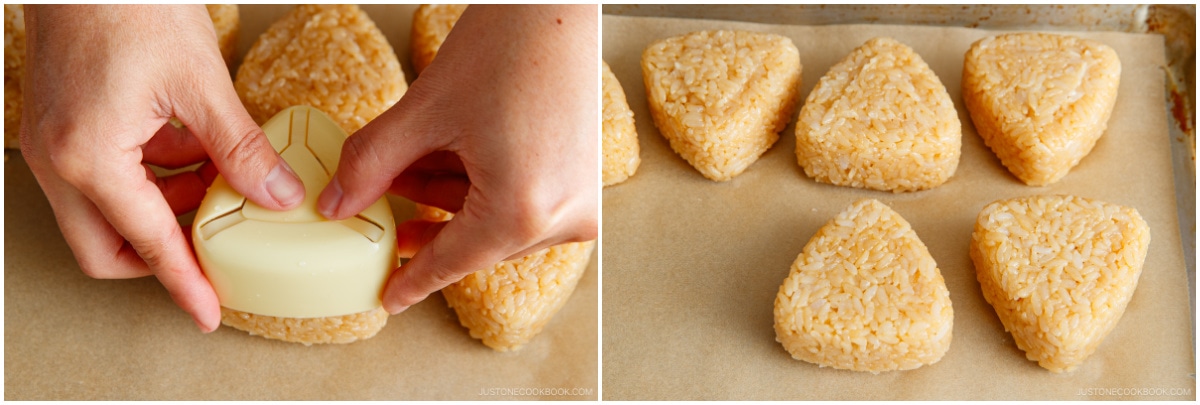
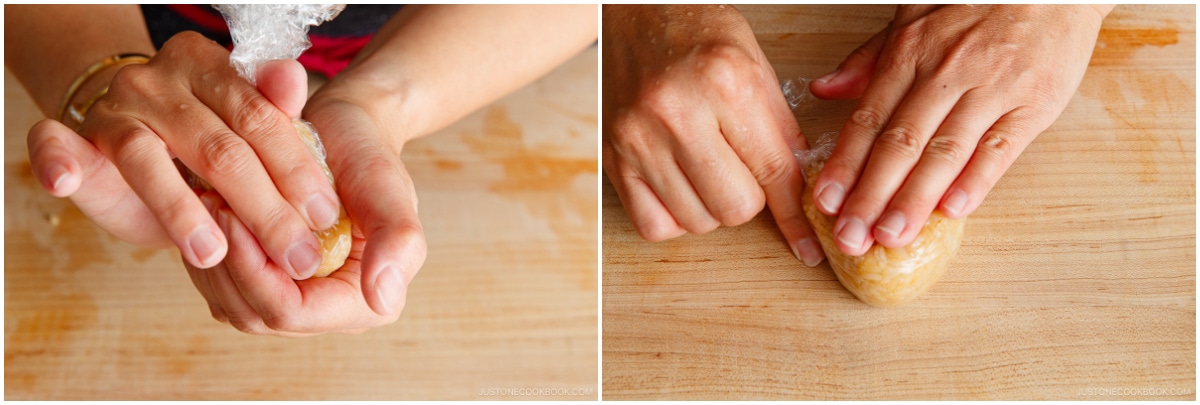
- Now, firmly hand press the rice balls to keep them from falling apart while grilling. Press them a bit more tightly than you would a regular onigiri. First, moisten both palms with a bit of water to prevent the rice from sticking. Then, pick up a rice ball in your non-dominant hand. Make a "mountain" shape with your dominant hand. Place it on top of the rice and gently press the triangle corner while you squeeze the fingers and heel of your bottom hand to gently press the sides flat.Now, rotate toward you the triangle corner you just pressed. A new corner will now point up. Repeat the above “press and rotate” steps to hand press the second triangle corner and then the third one, always keeping your non-dominant hand on the bottom and your dominant hand on top. Press and rotate a final 2–3 more times to finish.
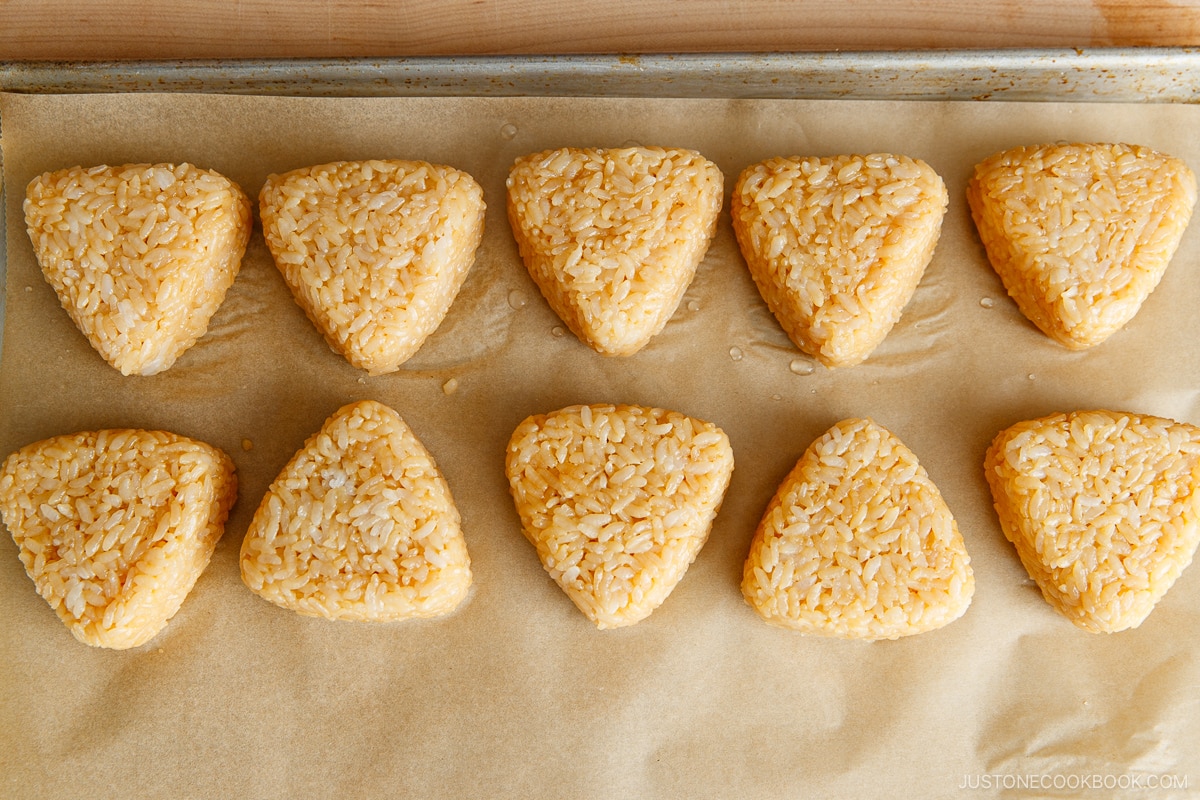
![Yaki Onigiri 9]()
- In the image below, the top row is hand pressed while the bottom row is not.
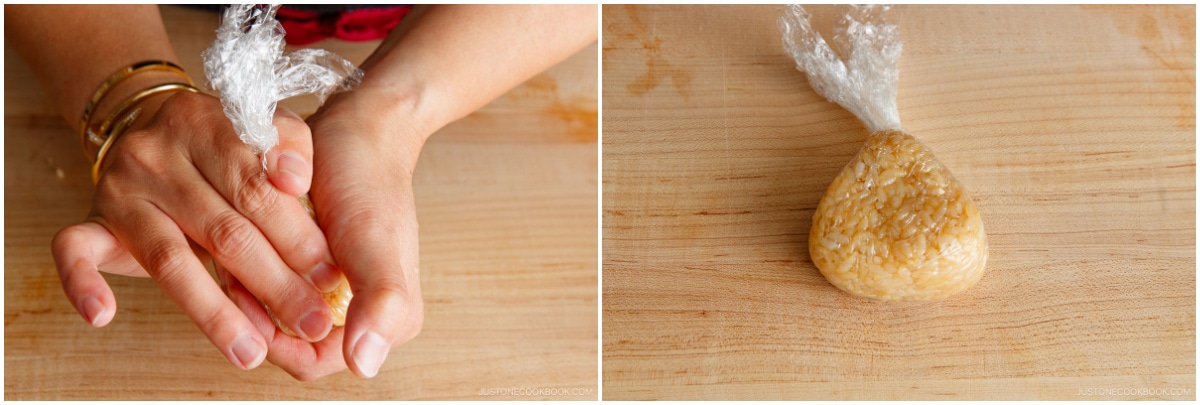
- Optional: You can press the onigiri with plastic wrap instead if you don‘t want to touch the rice with your hands: Lay a piece of plastic wrap on the work surface, wet your fingers, and place the onigiri in the middle.
![Yaki Onigiri 11]()
- Gather the corners of the plastic wrap and twist it a few times to tighten it around the rice. Form the rice into a triangle shape in the same manner that I described above.


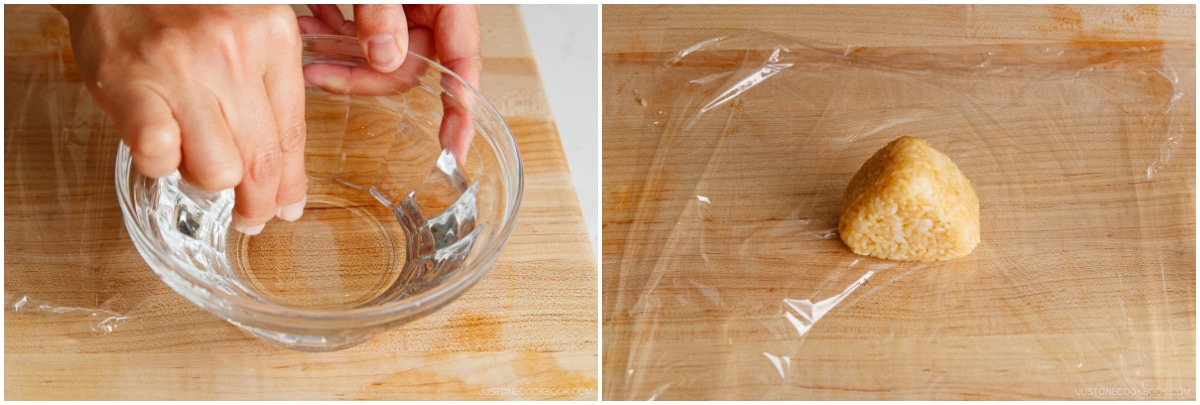
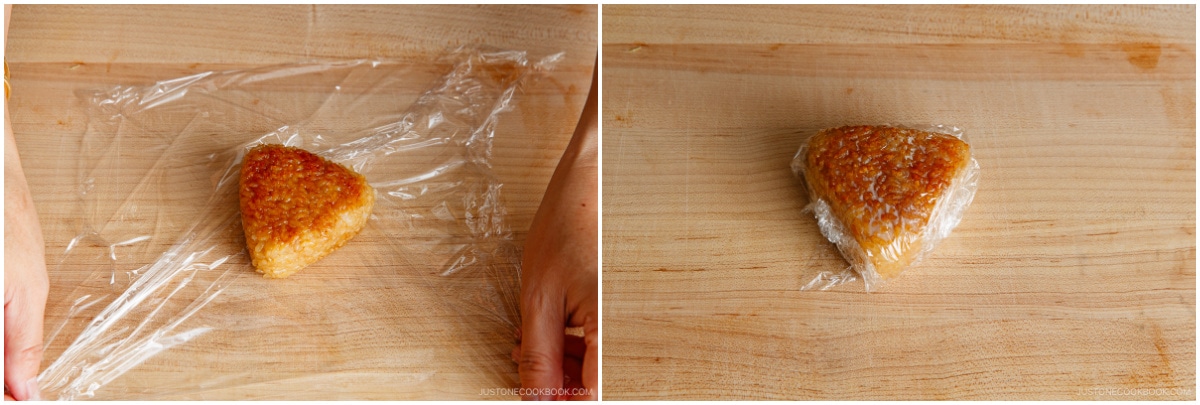
To Shape the Onigiri with Plastic Wrap (optional)
- Instead of using an onigiri mold, you can use plastic wrap to shape the rice ball. Place a piece of plastic film on the working surface, wet your fingers, and put the rice on top. Gather the corners of the plastic film and twist it a few times to tighten it around the rice.
![Yaki Onigiri 13]()
- Form the rice into a triangle shape through the plastic in the same manner that I described above for hand-pressing the onigiri. Repeat with the remaining rice. Nami's Tip: To shape the onigiri with your hands the traditional way, see the step-by-step instructions and images in my Onigiri (Japanese Rice Balls) post.

To Pan-Grill
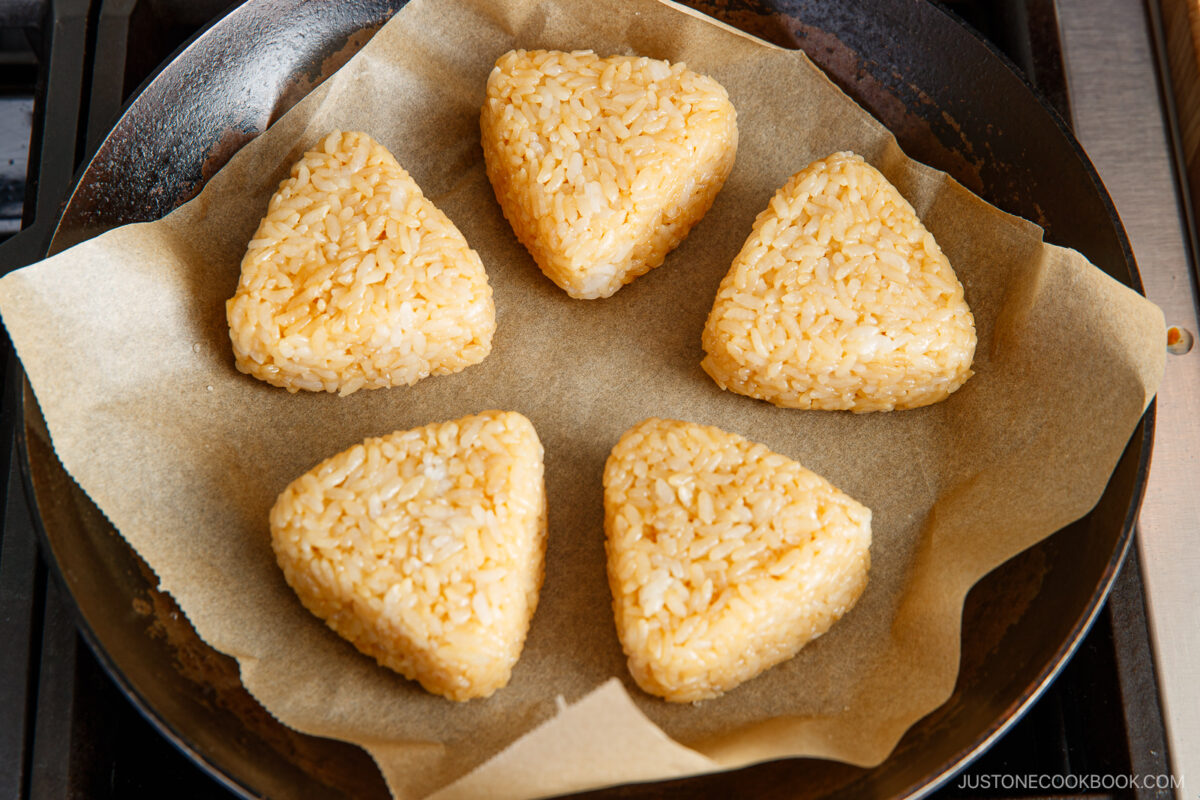
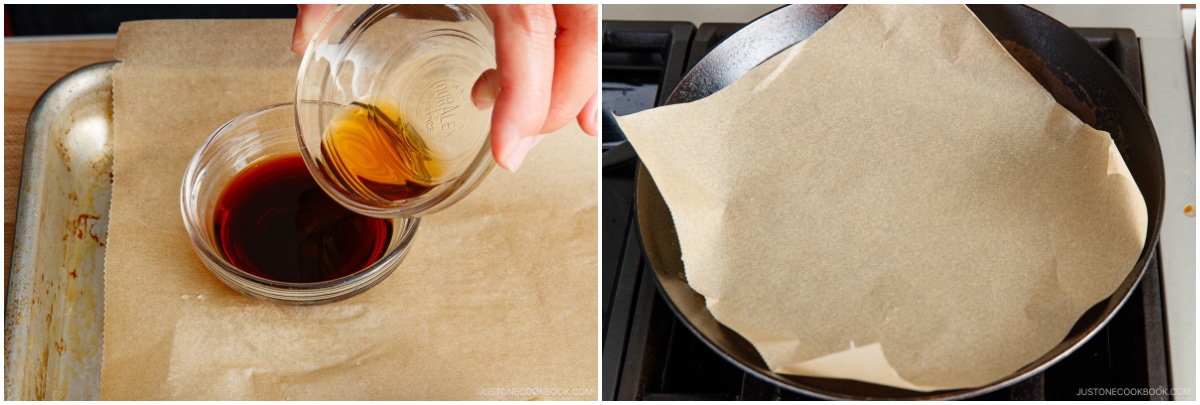
- Combine 1 Tbsp soy sauce and 1 tsp toasted sesame oil for the glaze. Place a sheet of parchment paper on a large frying pan.
![Yaki Onigiri 15]()
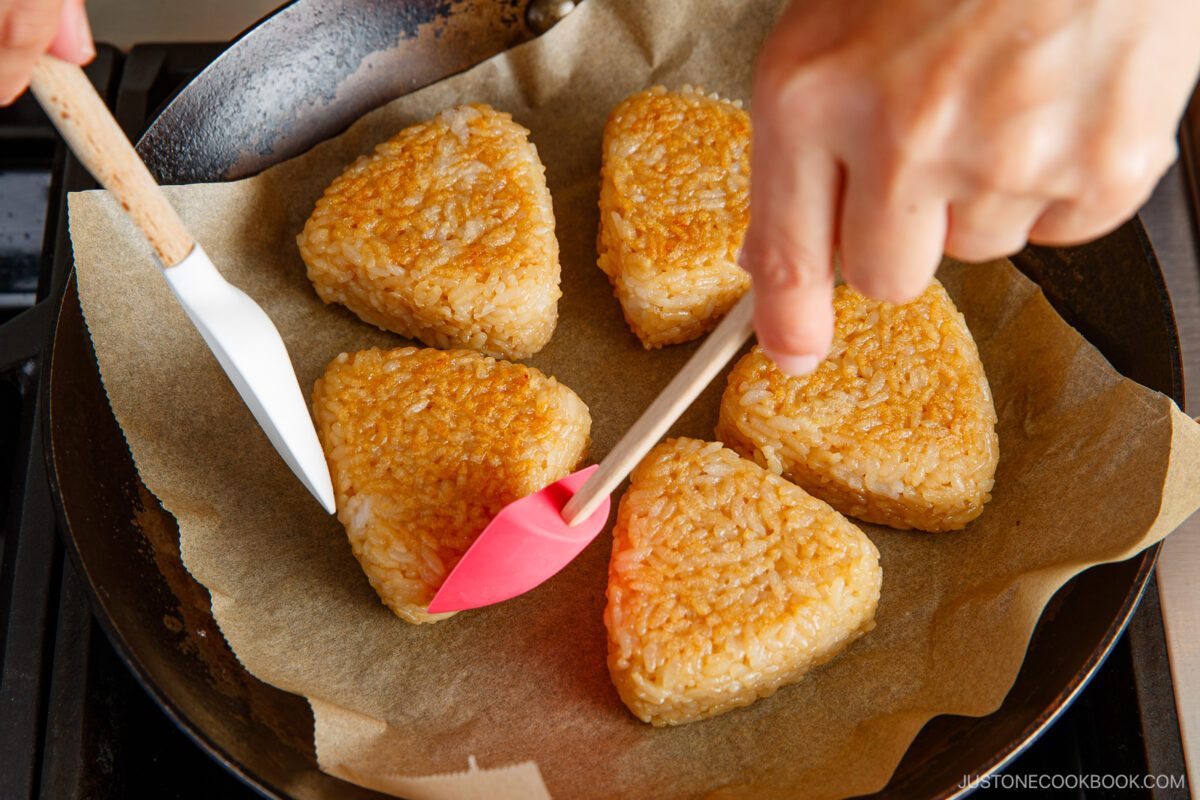
- Gently place the rice balls on the parchment paper and grill on medium-low heat until all sides are crispy and lightly browned. Once browned on the bottom, turn them over (I use two silicone spatulas). Don’t flip them until browned; work on one side at a time and avoid handling them too much, which may cause the onigiri to break into pieces.
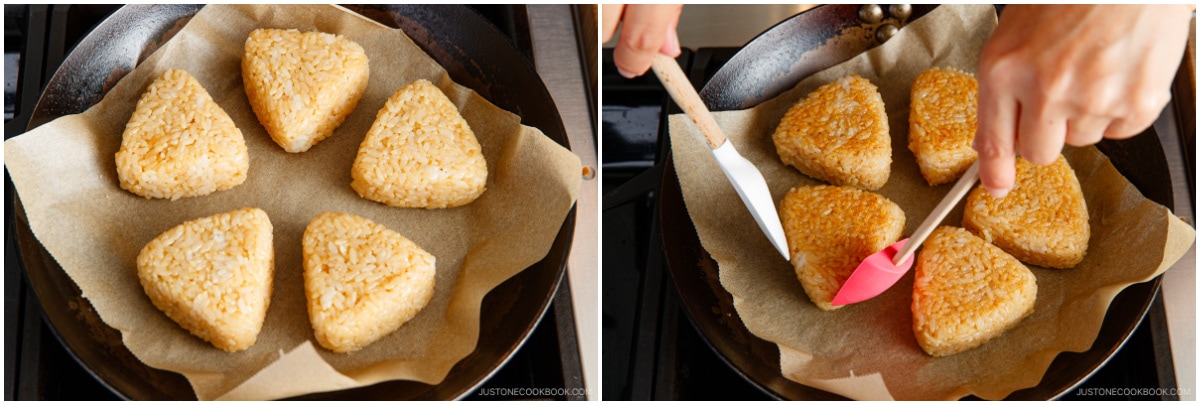
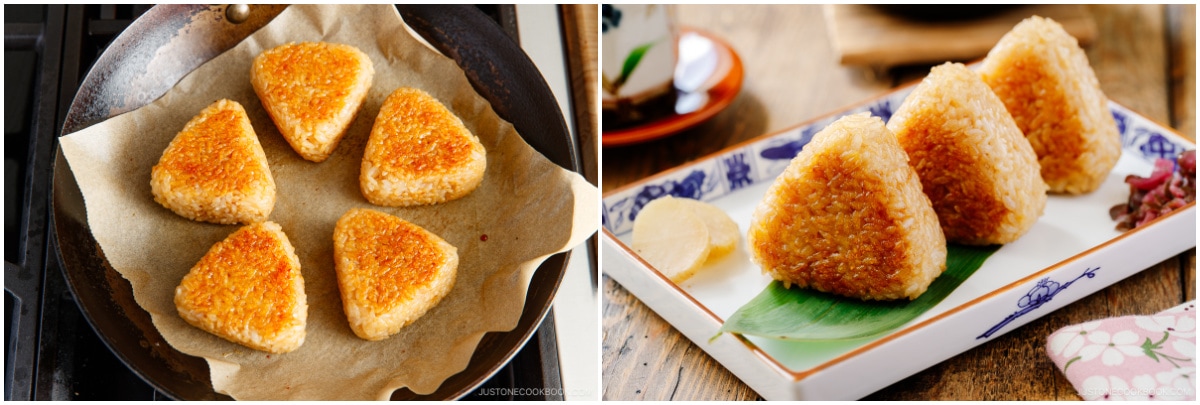
- Rotate the onigiri to grill all sides and make sure they become crispy.
![Yaki Onigiri 17]()
To Glaze
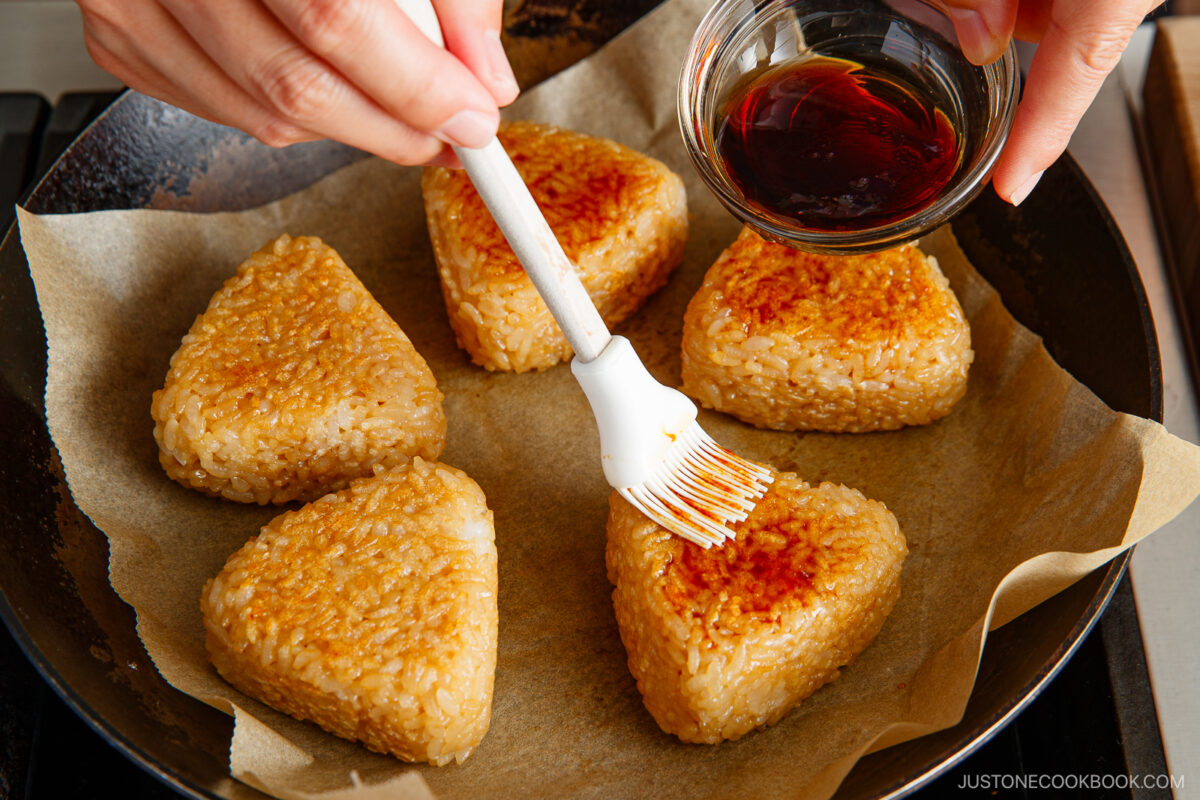
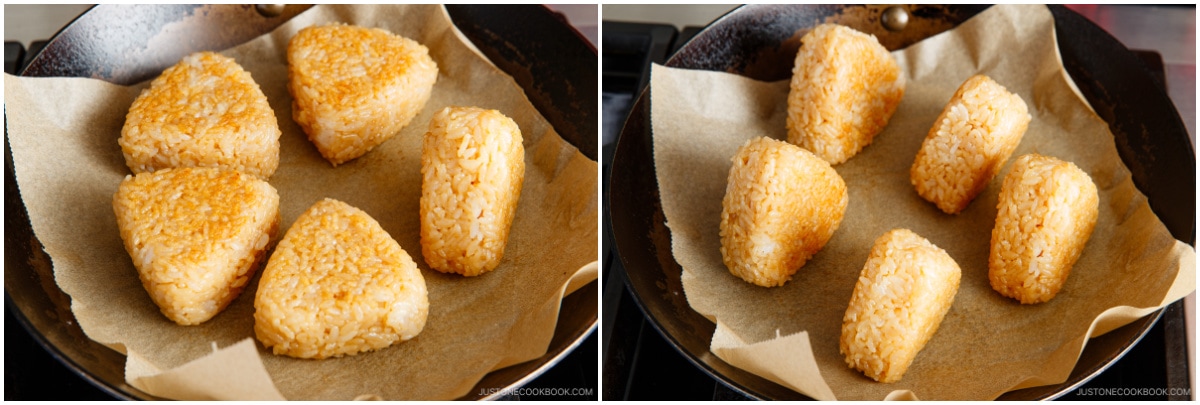
- Once they are toasted and lightly brown, turn the heat to low (or turn off the heat). Brush the onigiri sides with the soy sauce glaze and turn over to grill on the sauce side. Then, brush on the other side.
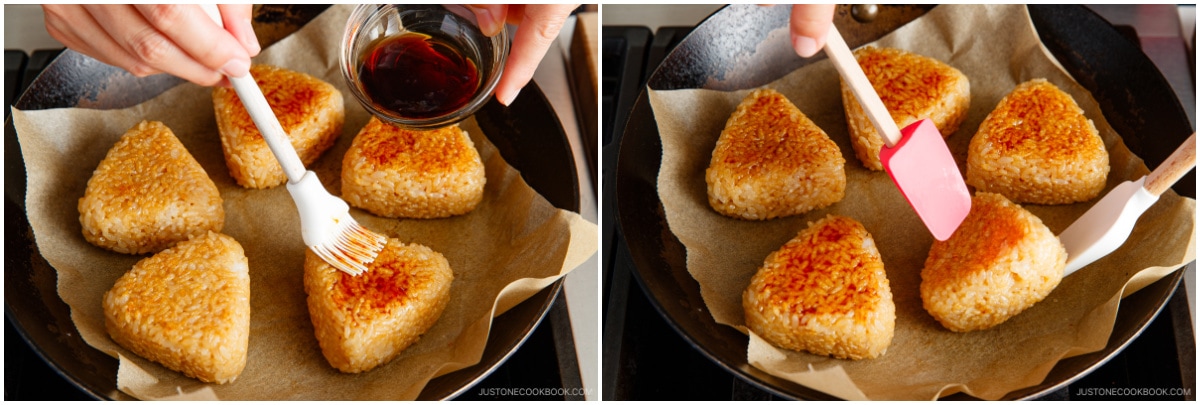
- Be careful not to burn the onigiri after you brush it with the glaze. Optionally, you can brush them with my homemade unagi sauce and teriyaki sauce. Your Yaki Onigiri are now ready to enjoy.
![Yaki Onigiri 20]()
To Store
- Individually seal each yaki onigiri in plastic wrap and freeze for up to a month. Rice gets hard and dry in the fridge, so I recommend freezing over refrigerating. If you must store it in the fridge, cover the individually wrapped yaki onigiri with a thick kitchen towel and refrigerate for up to 2 days. The towel will keep the food cool but prevent it from getting too cold. When you‘re ready to eat, bring it back to room temperature and reheat in a microwave or frying pan.
Nutrition
Calories: 207 kcal · Carbohydrates: 42 g · Protein: 4 g · Fat: 2 g · Saturated Fat: 0.3 g · Polyunsaturated Fat: 1 g · Monounsaturated Fat: 1 g · Sodium: 420 mg · Potassium: 38 mg · Fiber: 1 g · Sugar: 1 g · Calcium: 3 mg · Iron: 2 mg Course: Side DishCuisine: JapaneseKeyword: japanese rice ©JustOneCookbook.com Content and photographs are copyright protected. Sharing of this recipe is both encouraged and appreciated. Copying and/or pasting full recipes to any website or social media is strictly prohibited. Please view my photo use policy here.
Editor’s Note: This post was originally published on June 25, 2012. It was updated with a new video and images on March 23, 2024, and republished with more helpful content on June 23, 2025.