

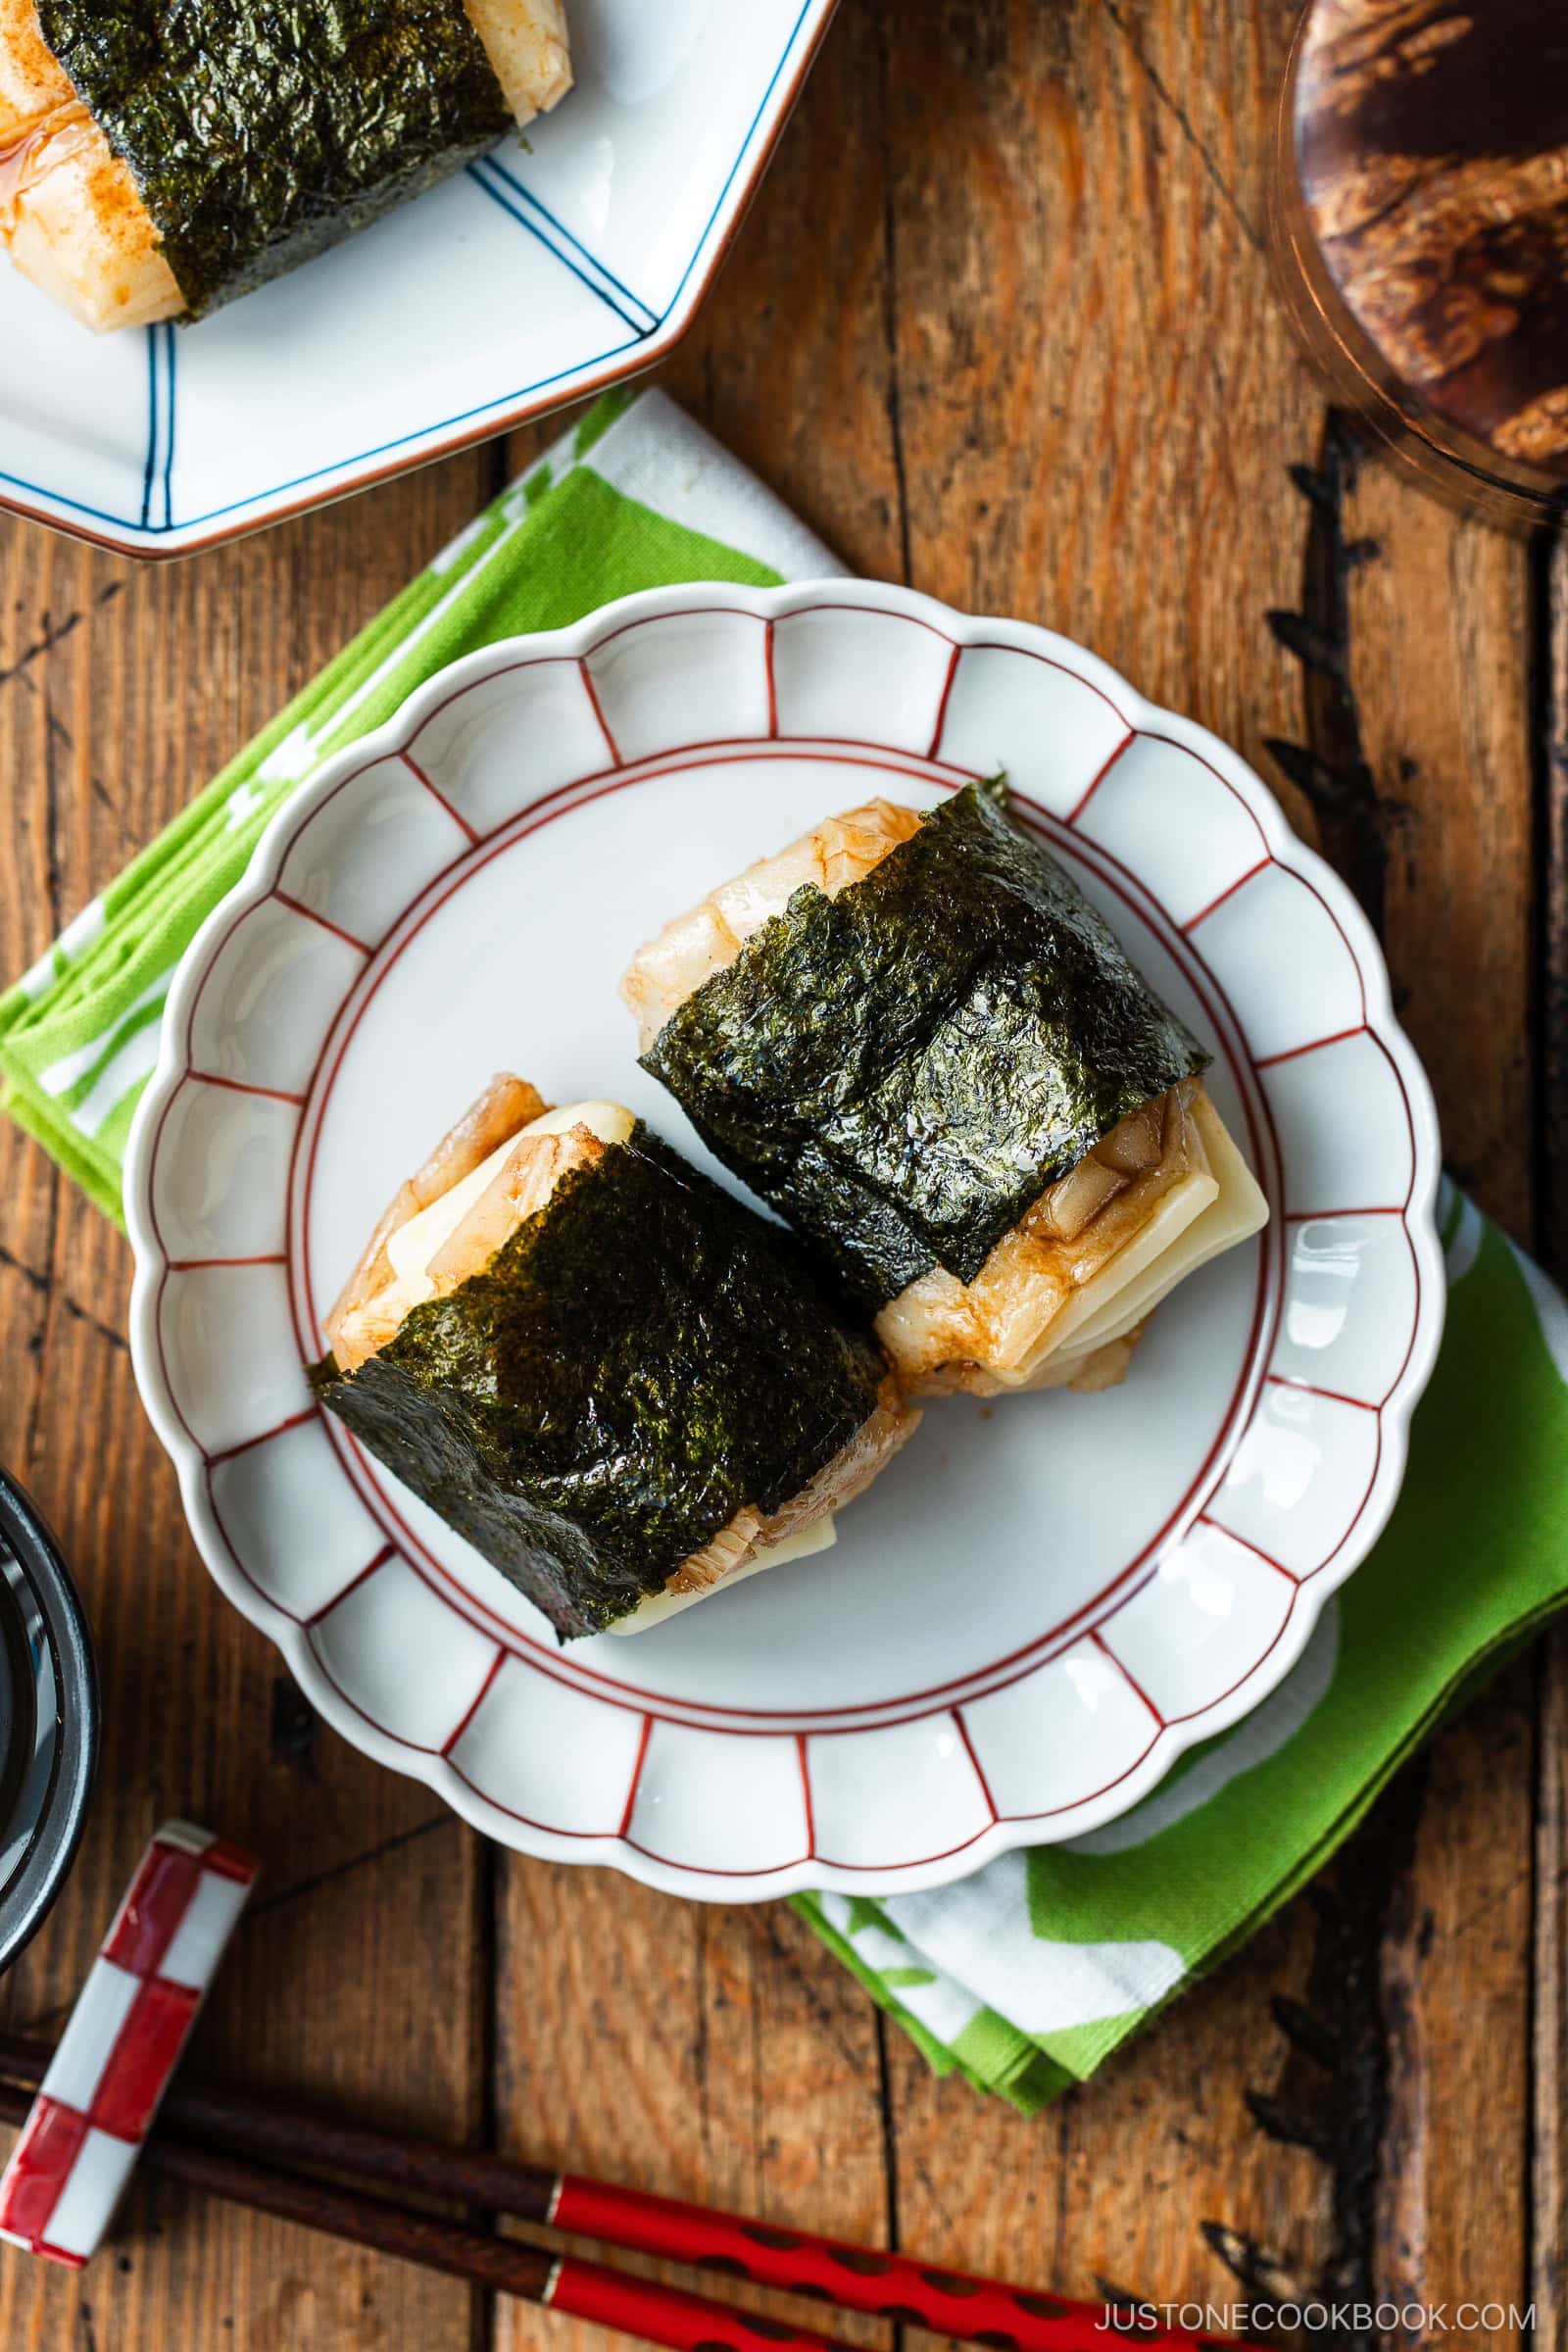
Isobeyaki Mochi with Cheese 磯部焼き餅
Give plain mochi a delicious umami punch with my easy Isobeyaki Mochi with Cheese. Dipped in soy sauce and wrapped in nori seaweed, it’s a popular way to enjoy glutinous rice cakes as a satisfying snack on Japanese New Year or anytime.
The Japanese have many delicious ways to prepare plain mochi. Today, I’ll show you how I make pan-grill Japanese glutinous rice cakes stuffed with cheese in my Isobeyaki Mochi with Cheese recipe. It’s crispy, chewy, melty, and savory—and it just might become your new favorite mochi.
If you love Japanese rice cakes, try my recipes for Ozoni, Udon Noodle Soup with Toasted Mochi (Chikara Udon), and Zenzai (Sweet Red Bean Soup with Mochi)!
What is Isobeyaki Mochi?
Isobeyaki (磯辺焼き) mochi is grilled or pan-fried Japanese glutinous rice cakes called yakimochi that we soak in soy sauce and wrap in nori (dried laver seaweed). Dishes made with nori and ingredients harvested from the coast are named isobe, which means “seashore” in Japanese. It’s popular in eastern Japan to prepare yakimochi with soy sauce and nori, while soy sauce with sugar is more common in western Japan.
Why I Love This Recipe
- It’s bursting with umami. I love the rich and salty flavor from the combination of cheese, soy sauce, and nori. Together, they deliver a 1-2-3 savory punch!
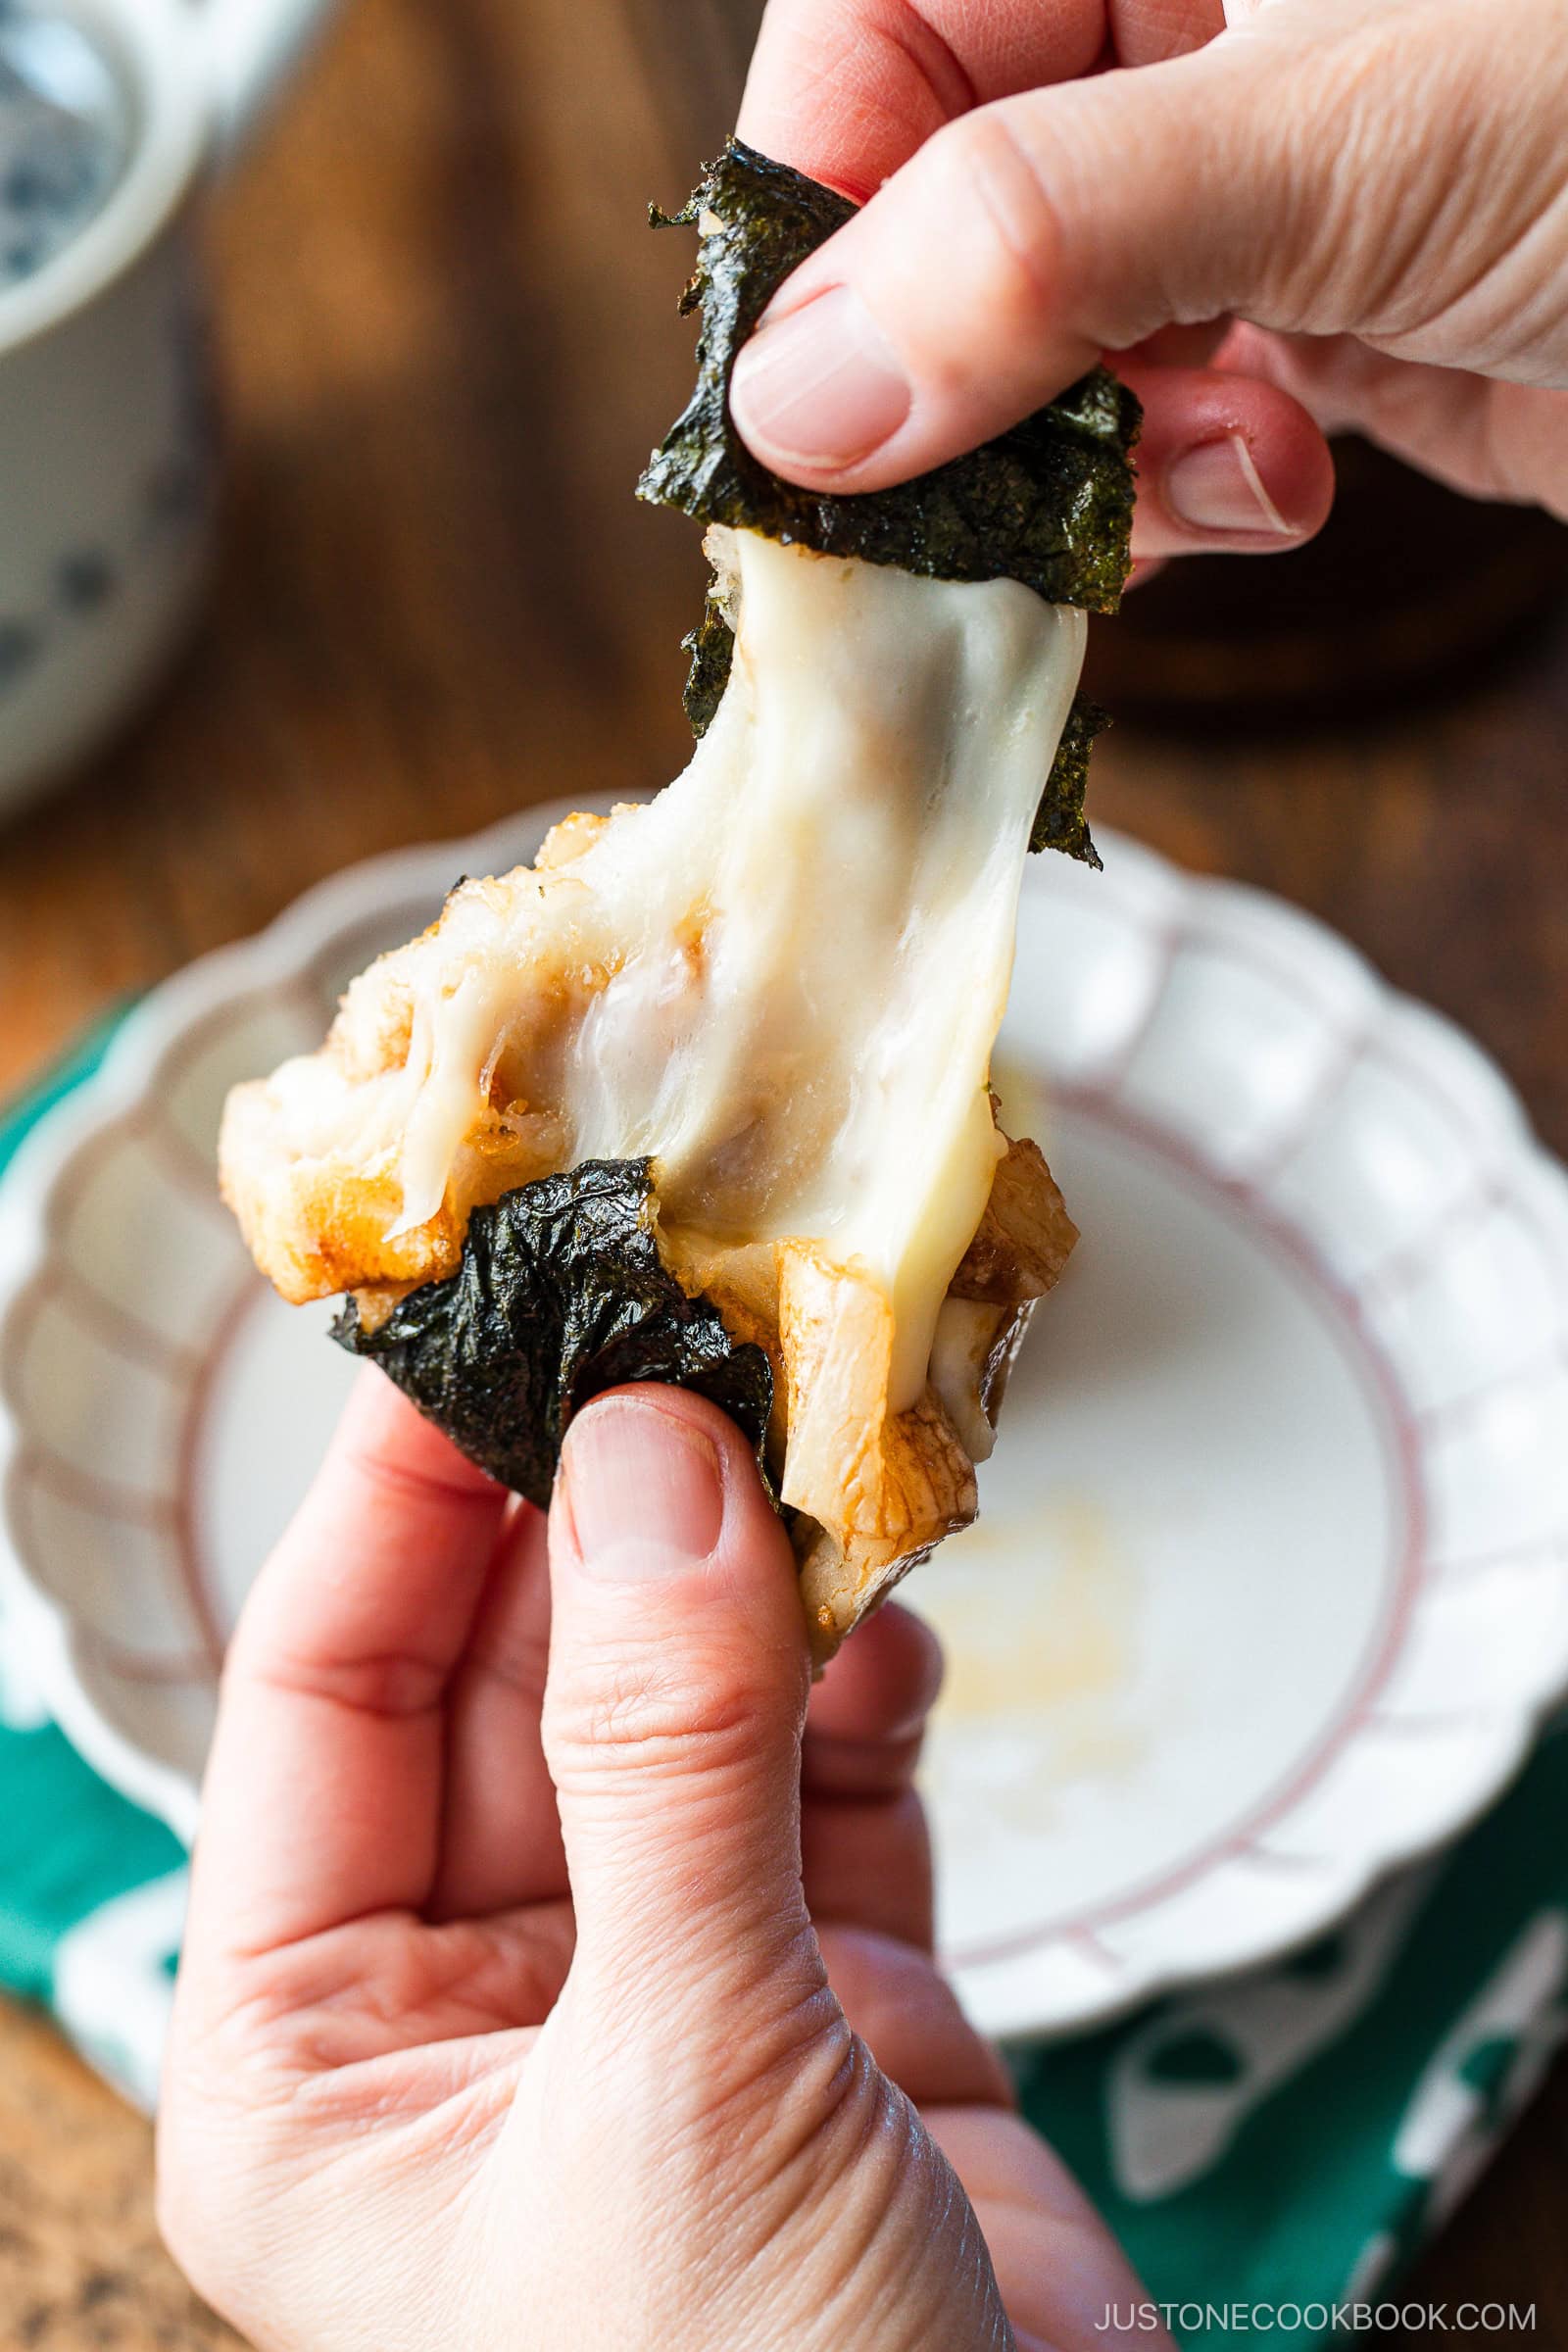
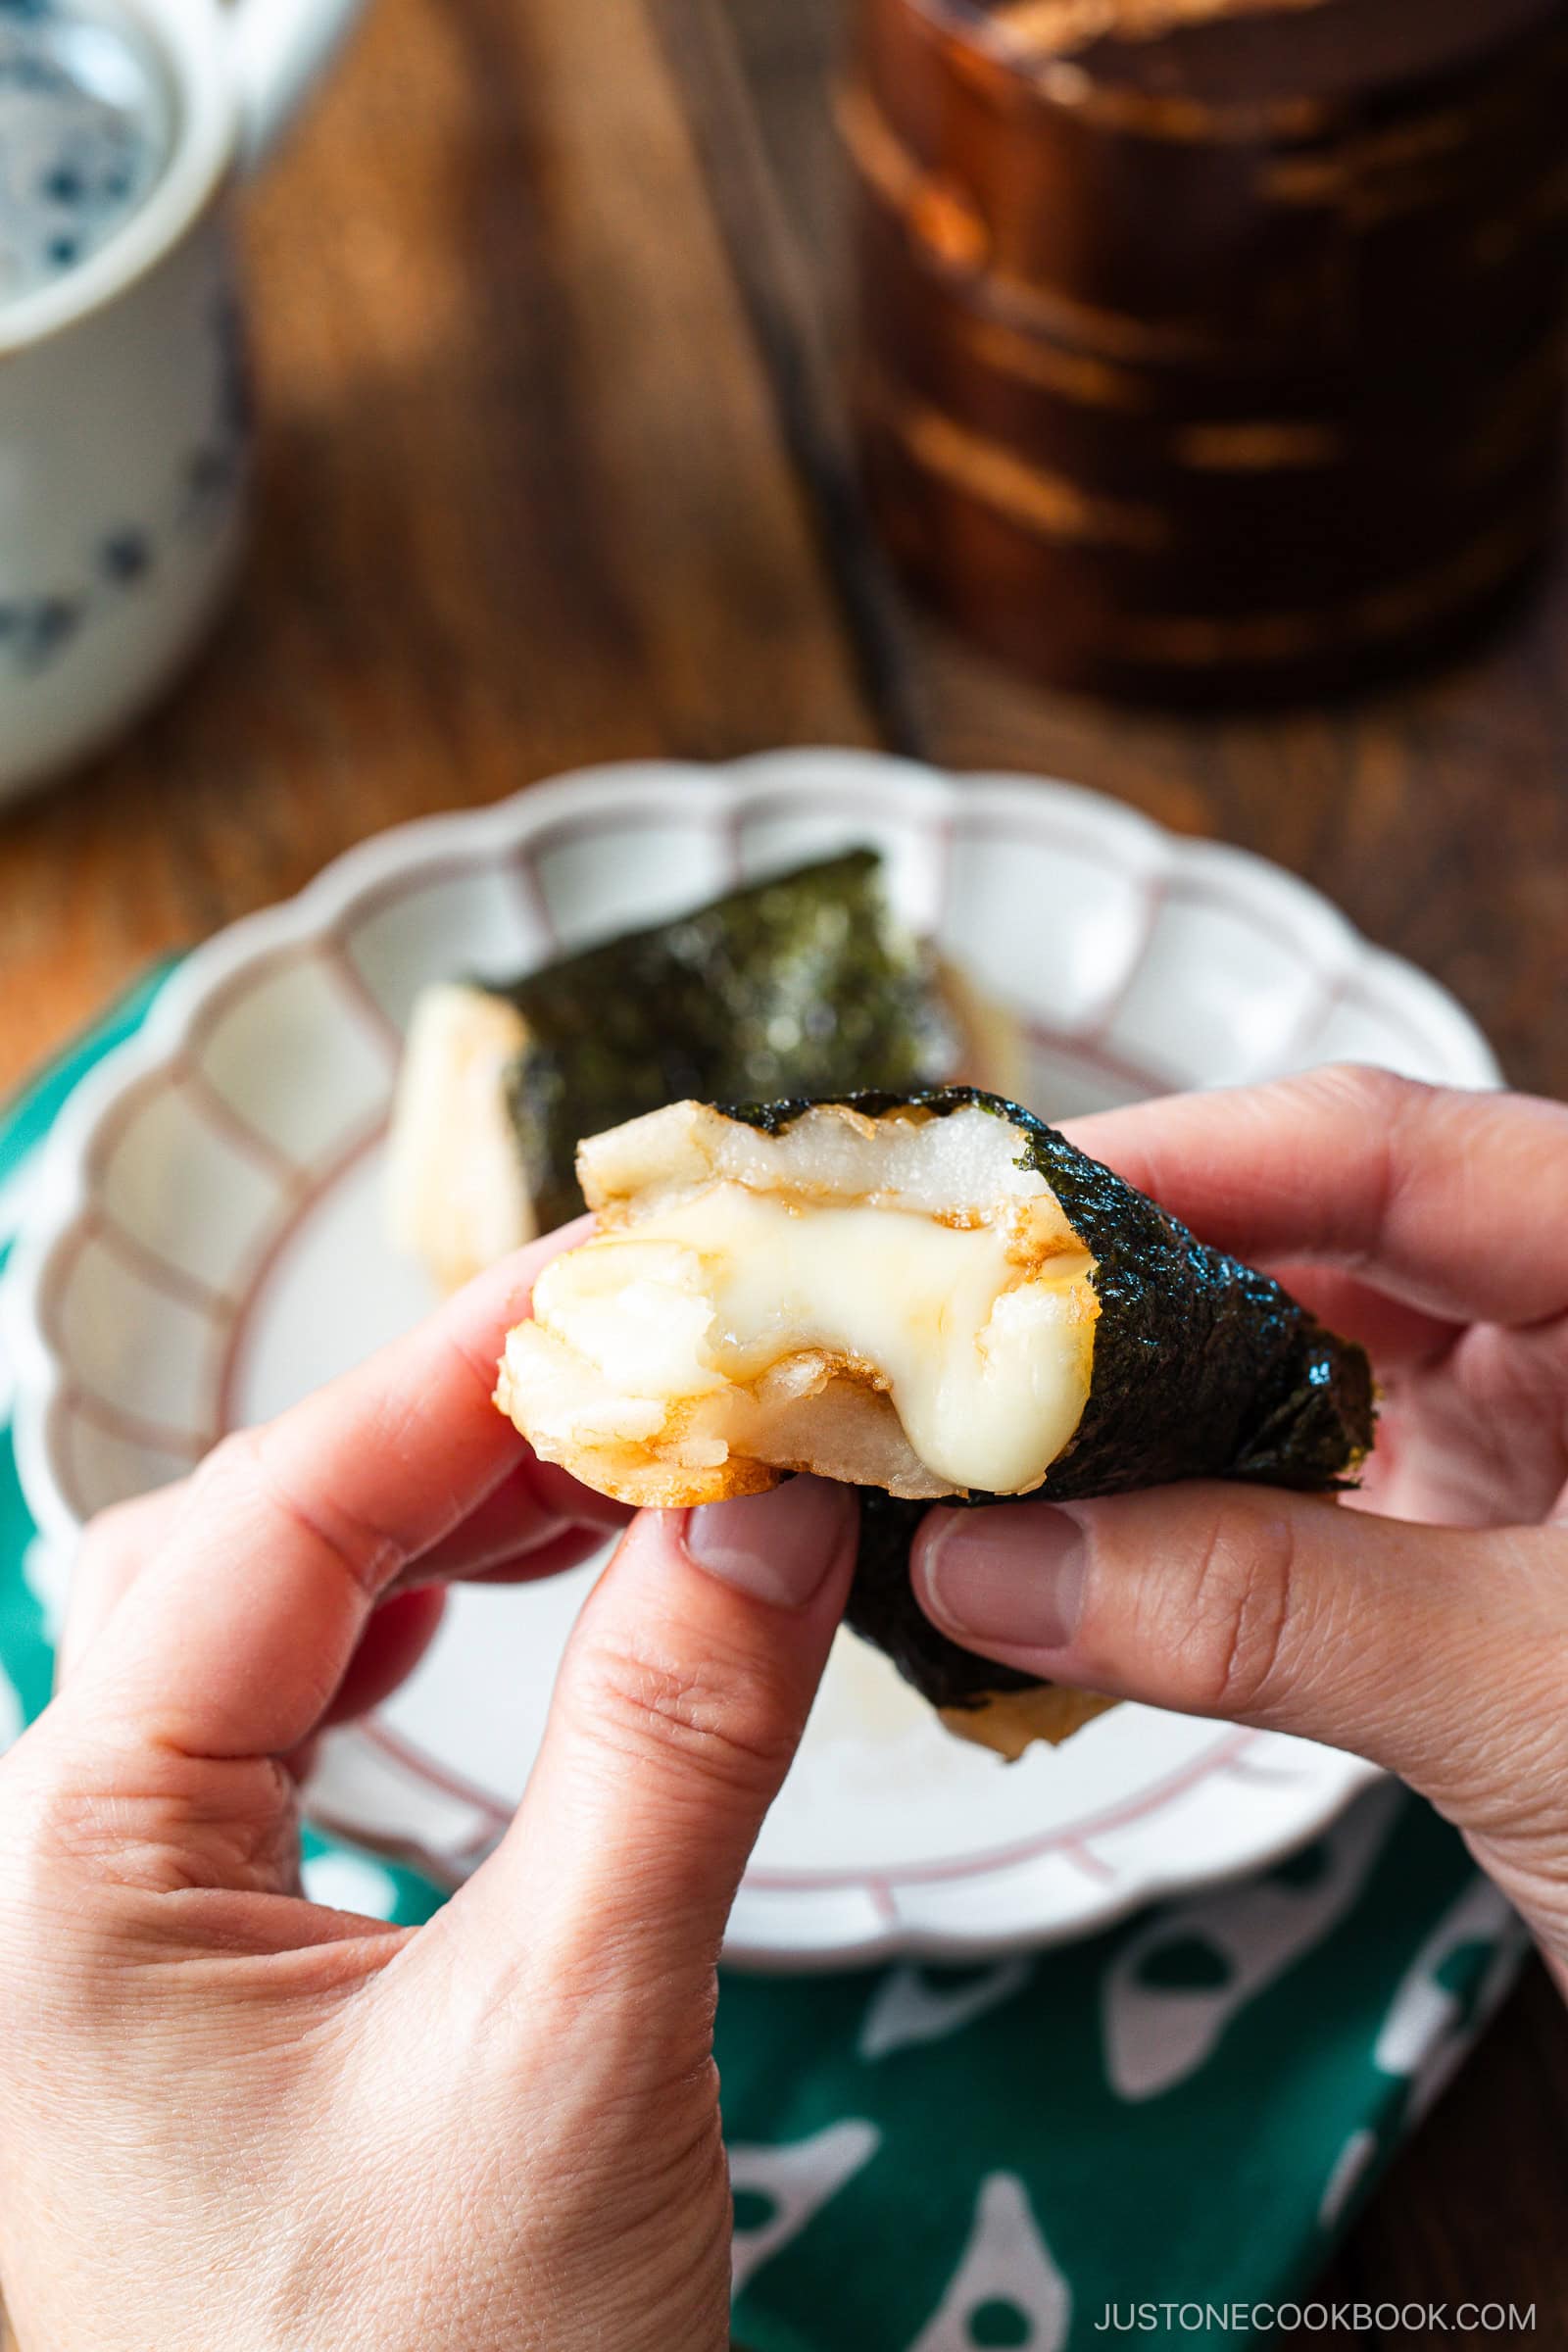
- The chewy and melty textures are so satisfying. The hot mochi melts the cheese stuffing for a stretchy cheese pull!
- It’s quick and easy to make. I use shelf-stable kiri mochi (see below) that I always have in my pantry, so it’s ready in just minutes.
Ingredients for Isobeyaki Mochi
- Japanese rice cakes
- Soy sauce
- Sugar
- Nori (dried laver seaweed)
- Cheese slices – optional
Find the printable recipe with measurements below.
Substitutions
- Mochi: This recipe calls for convenient kiri mochi (切り餅, also kirimochi) that’s cut, dried, and individually wrapped. You can find it in Japanese grocery stores and on Amazon. This “cut mochi” stores well and is what Japanese households use to prepare mochi at home. It’s so easy to use, and it’s the next best thing to fresh. If you like to make fresh mochi at home, follow my guide on How to Make Mochi with a Stand Mixer.
- Nori: I used crispy ajitsuke nori (味付け海苔) that’s seasoned with soy sauce, sugar, and salt. If you don’t have it, you can cut pieces of plain seaweed sheets that are normally used for sushi rolls. If you’re not fond of seaweed, go ahead and skip it.
- Cheese: You can use any kind of sliced cheese. In Japan, it’s common to use processed cheese found in any grocery store. In this recipe, I used sliced mozzarella, but you can use Swiss, provolone, Muenster, Brie…the options are endless.
- Soy sauce: Use tamari soy sauce for gluten-free.
How to Make Isobeyaki Mochi
Preparation
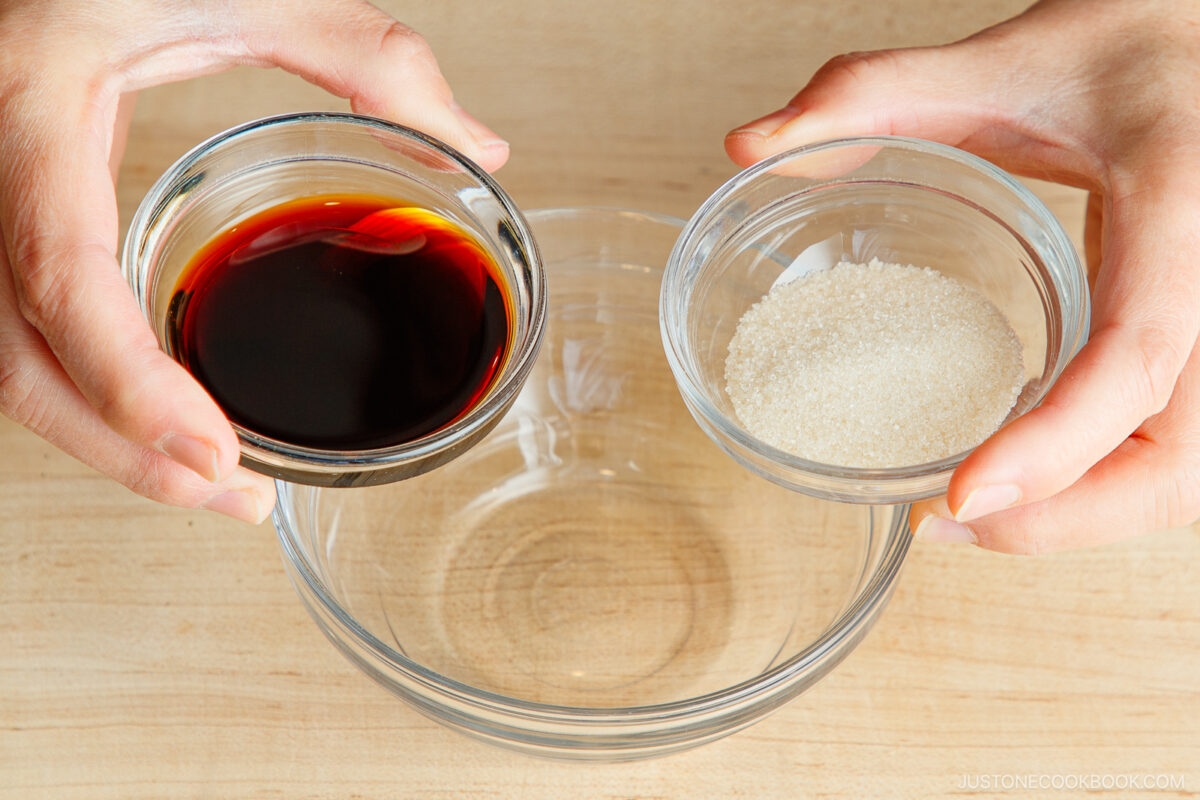
Step 1 – Make the sweet soy sauce. Add the soy sauce and sugar to a glass bowl and heat in the microwave until the sugar melts. Stir well to dissolve.
Cooking
Step 2 – Start grilling the mochi. Line a cold frying pan with parchment paper and set the mochi pieces on top. Turn on the heat to medium-low and cover with a lid.

Step 3 – Press down on the mochi when it puffs on the bottom. This will encourage toasting marks on the bottom surface. Then, grill them on the other side until puffed and soft in the middle.
Assemble
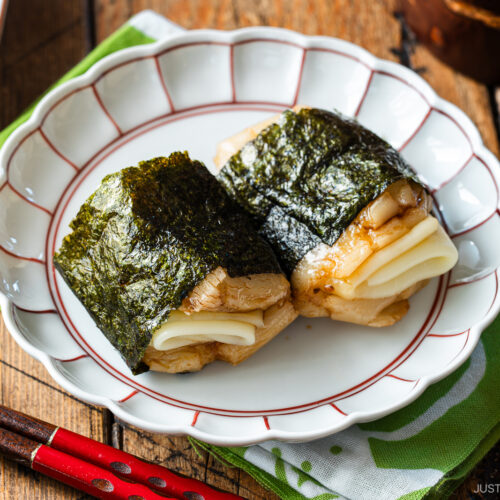
Step 4 – Smash the toasted mochi and season. Flatten the puffed-up mochi with your palm. Then, coat generously in the sweet soy sauce.
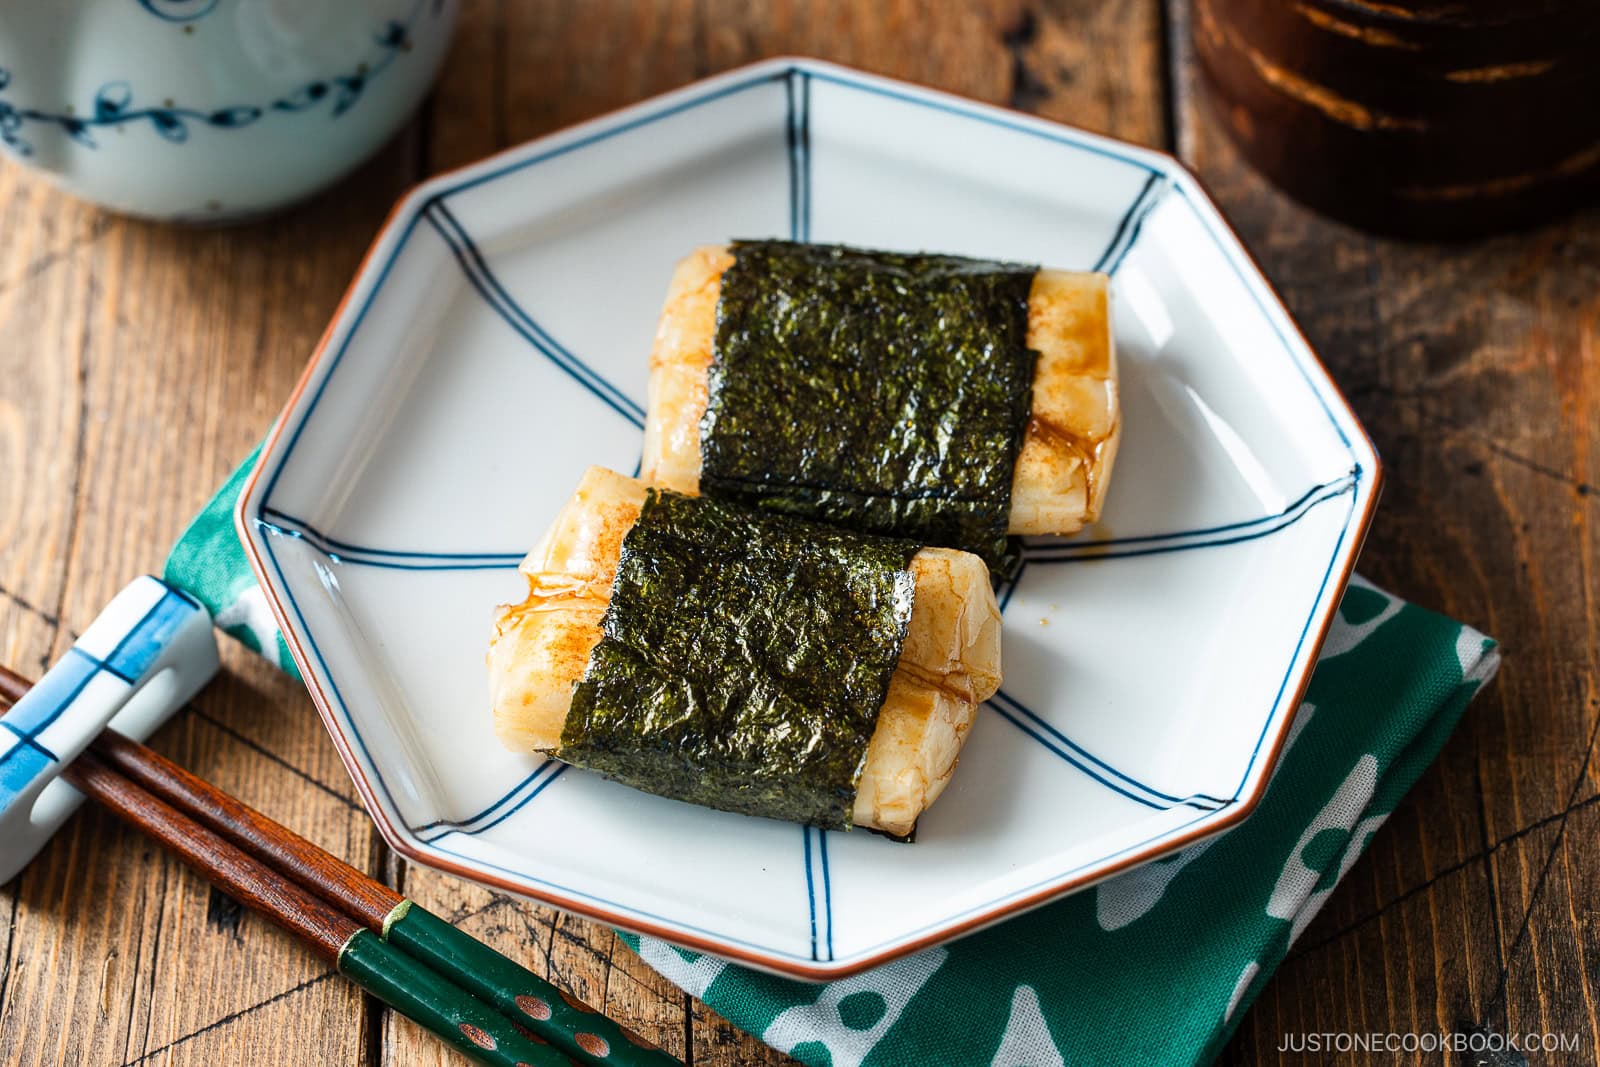
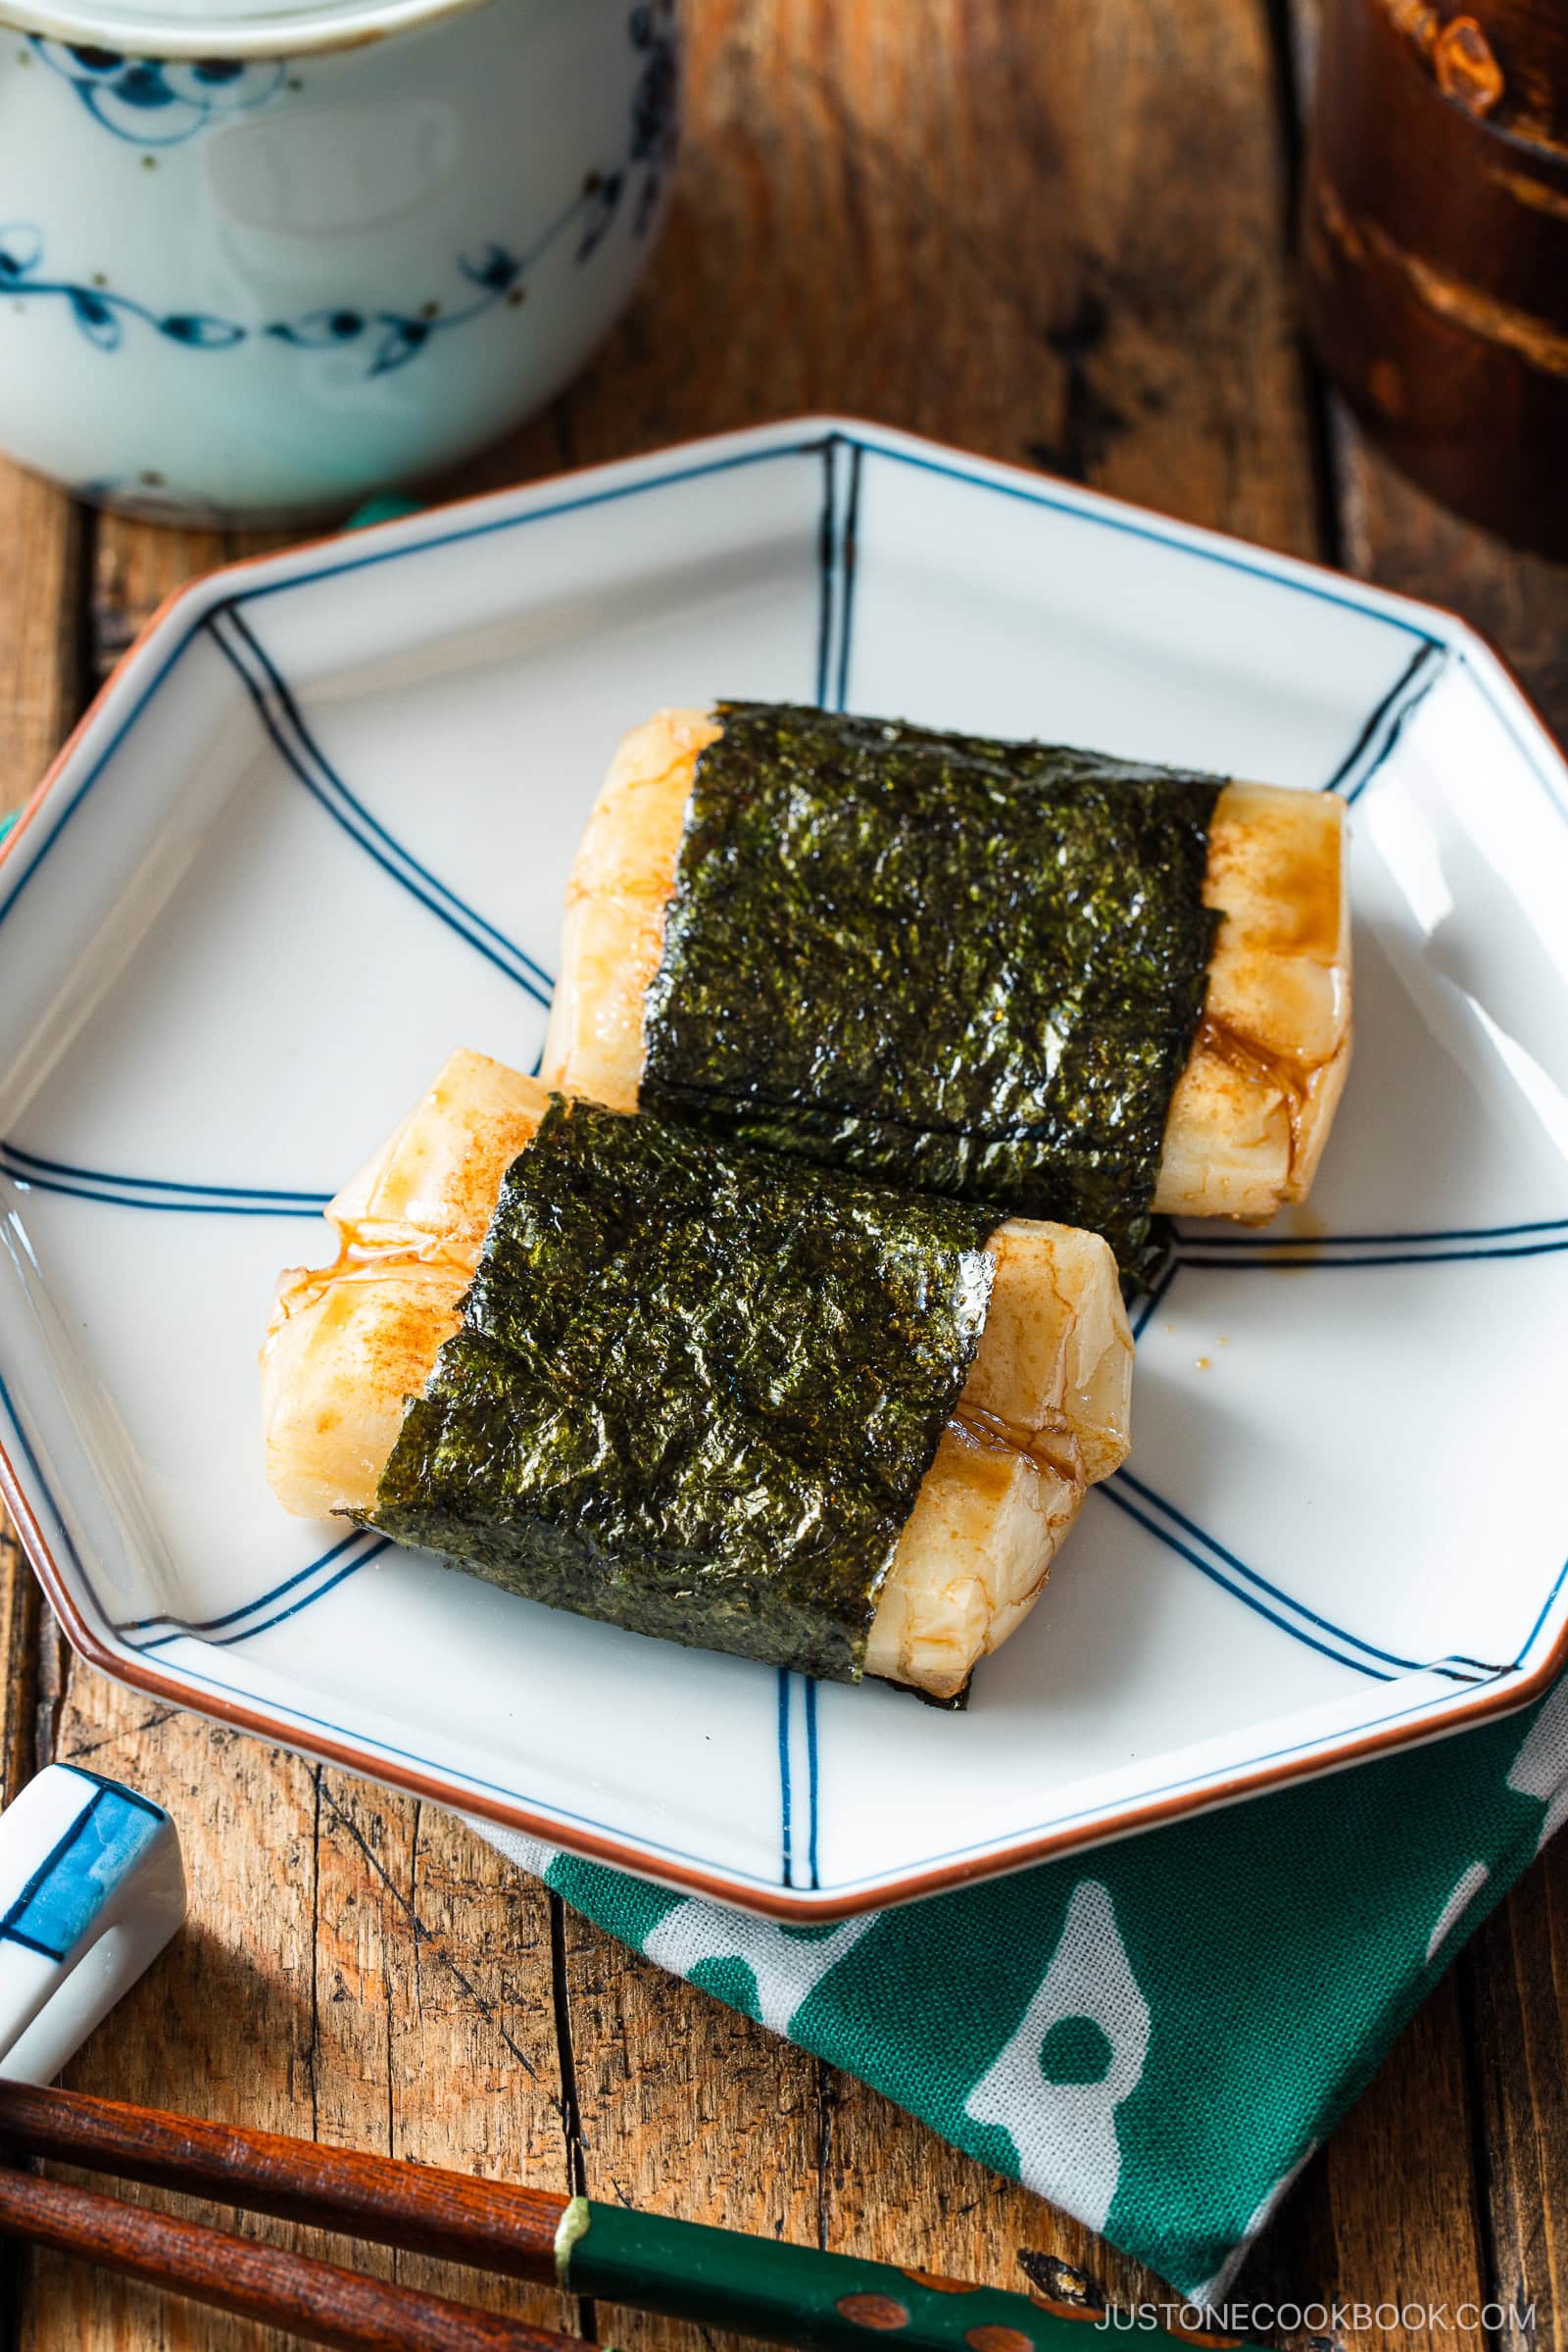
Step 5 – Wrap nori around the seasoned mochi. The dried seaweed sheet will adhere to the moistened mochi. Serve with chopsticks and enjoy!
Step 6 – (Optional) Stuff it with cheese. After seasoning it, pull to extend the hot mochi, then fold it over the sliced cheese. Wrap in the nori and serve.
Nami’s Recipe Tips
- Cook the mochi until it’s soft in the middle – You’ll know it’s done when the mochi puffs up. It should take about 5–6 minutes per side to get soft on the inside and crispy outside.
- Serve while it’s hot – Once it’s heated and flavored, enjoy it immediately. The grilled rice cake will start to harden as it cools, so serve it hot for the best chewy texture!
Variations and Customizations
- Sprinkle Japanese seven spice. For some extra heat, add the Japanese chili seasoning powder called shichimi togarashi to taste.
- Make butter soy sauce. Heat a pat of butter with your soy sauce and sugar in the microwave. The extra richness goes so well with the salty and umami flavors.
- Stuff it with a different filling. Instead of cheese, try filling the mochi with natto (Japanese fermented soybeans).
- Use firm tofu instead of mochi. Sandwich some cheese between two slices of firm tofu. Fry both sides in oil until browned, dip in soy sauce, and wrap in nori. You can also make isobeyaki with fish cake, scallops, potatoes, and potato mochi!
What to Serve with Isobeyaki Mochi
- With a hot beverage – Learn How to Make Japanese Green Tea for a cozy drink to accompany your isobeyaki mochi!
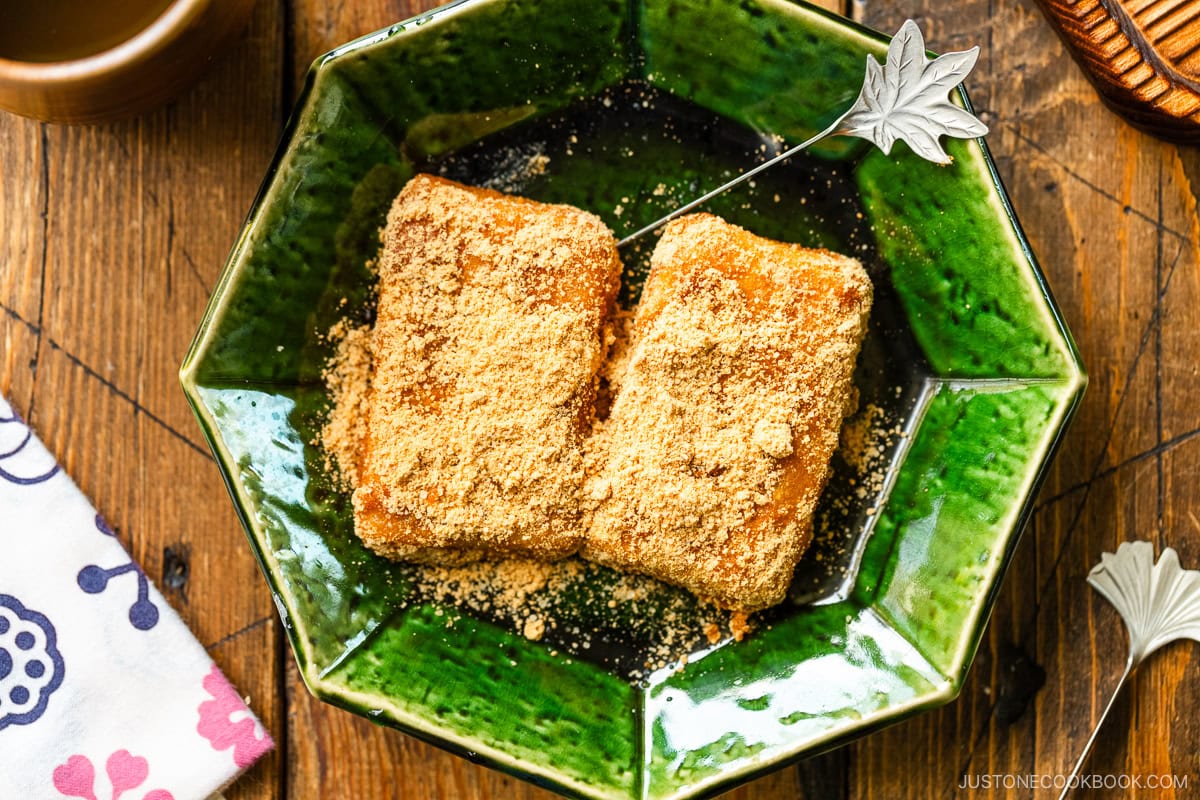
- With other mochi – I grew up eating plain mochi on New Year’s Day in three different flavors AND in Ozoni soup! See how to make sweet red bean paste (anko) mochi along with kinako mochi in my post How to Enjoy Japanese Mochi.
Storage Tips
To store: It’s best to cook the mochi right before you serve it, as it will harden as it cools. I recommend preparing only as much isobeyaki mochi as you can consume.
Frequently Asked Questions
Can I skip the sugar in this recipe?
You can if you wish. Plain soy sauce is actually a popular version of isobeyaki in eastern Japan. Alternatively, you can customize it with honey or your preferred sweetener.
Should I add mirin or sake to the sweet soy sauce?
It’s not necessary or traditional to do so. In Japan, we keep things simple when it comes to isobeyaki!
More Mochi Recipes
If you love this Isobeyaki Mochi with Cheese, you’re in for a treat with these other irresistible mochi recipes.
- Kinako Mochi
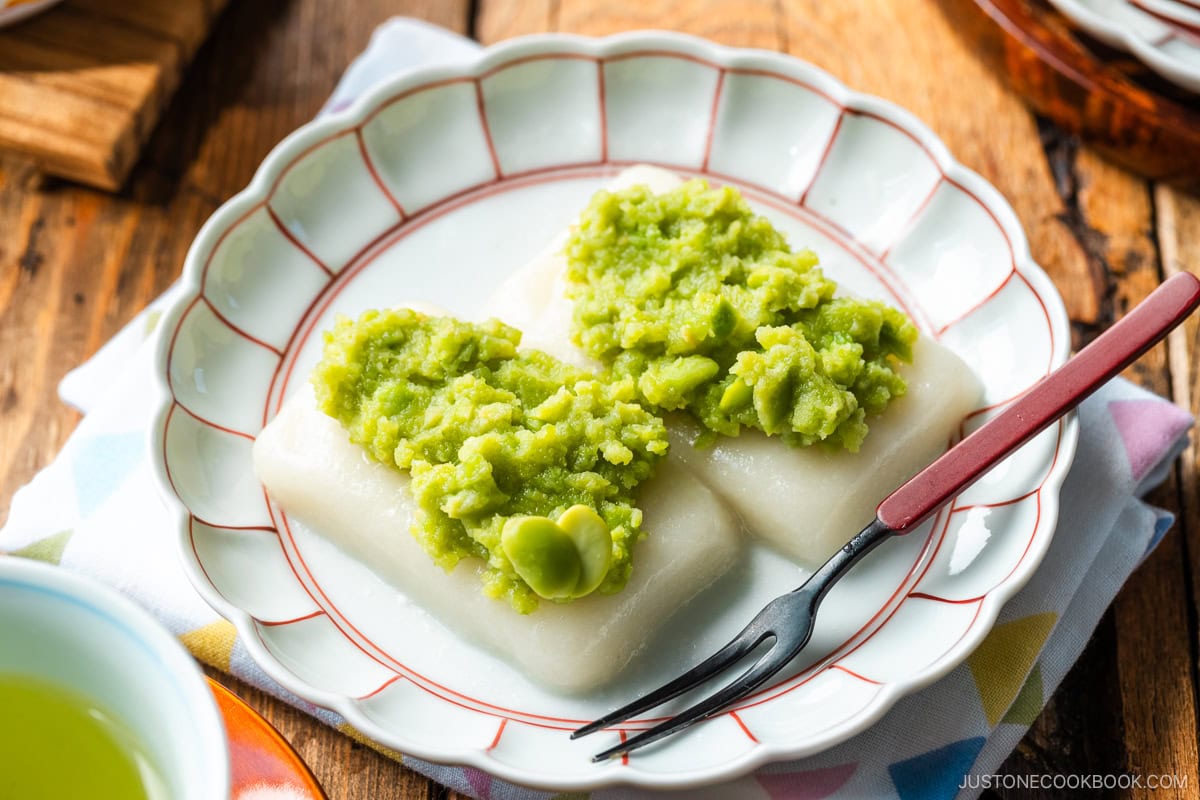
- Zunda Mochi (Sweet Edamame Mochi)
Isobeyaki Mochi
No ratings yet Give plain mochi a delicious umami punch with my easy Isobeyaki Mochi with Cheese. Dipped in soy sauce and wrapped in nori seaweed, it's a popular way to enjoy glutinous rice cakes as a satisfying snack on Japanese New Year or anytime. Print Pin Prep Time: 5 minutes Cook Time: 15 minutes
Ingredients
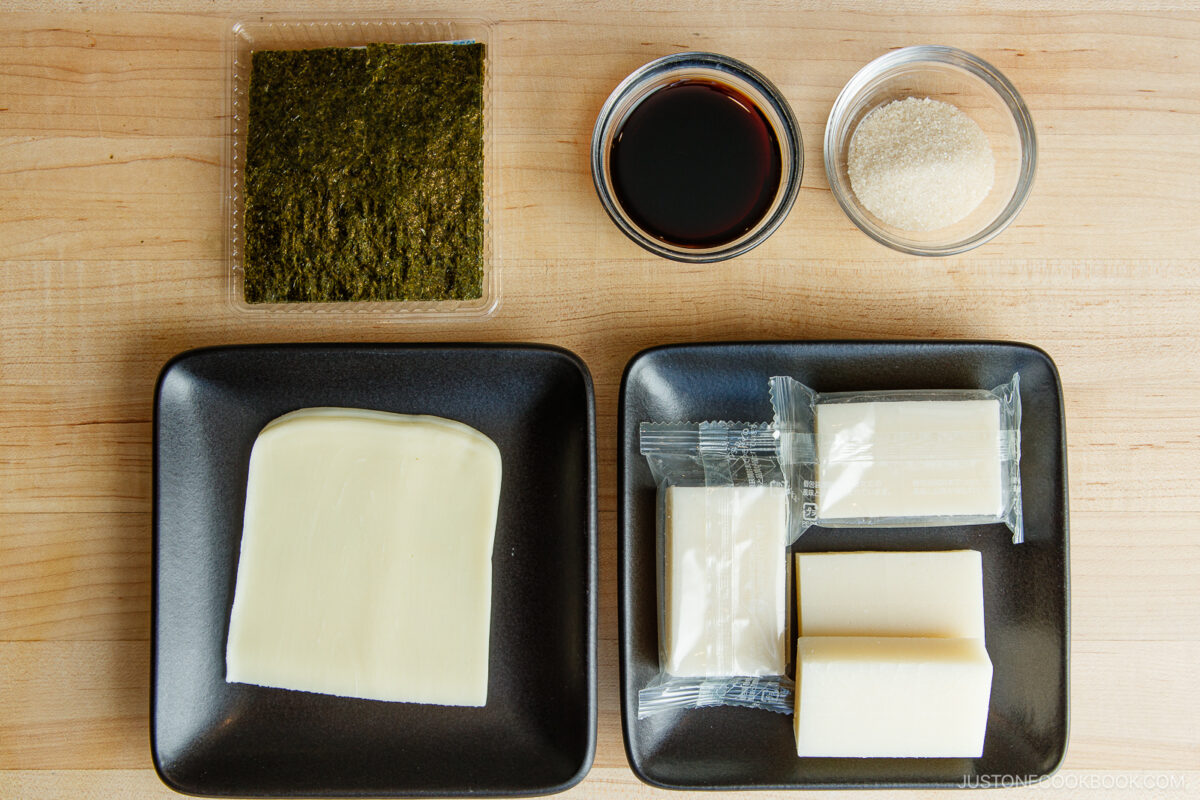
- ▢ 4 Japanese rice cake (kiri mochi)
- ▢ 2 Tbsp soy sauce
- ▢ 1 Tbsp sugar
- ▢ nori (dried laver seaweed) (I used seasoned ajitsuke nori)
- ▢ 2 slices cheese (optional; any kind)
Japanese Ingredient Substitution: If you want substitutes for Japanese condiments and ingredients, click here. Cook ModePrevent your screen from going dark
Instructions
- Gather all the ingredients.
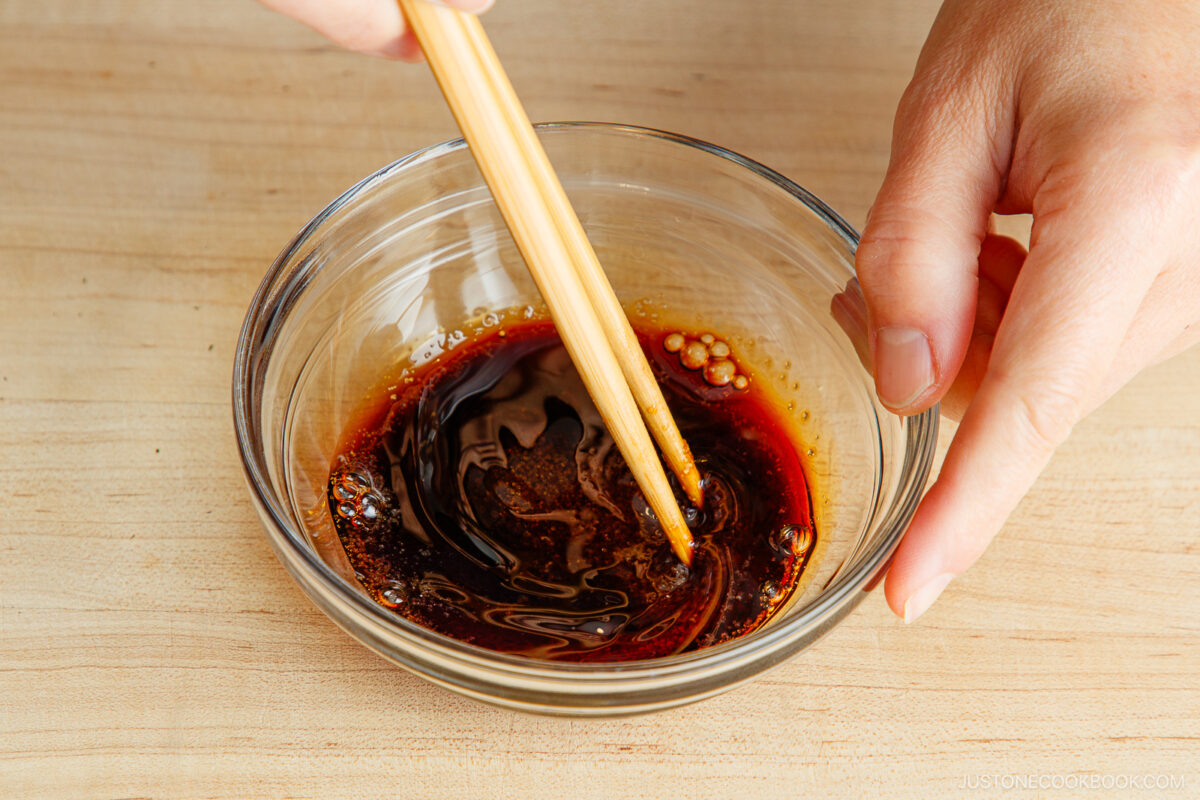
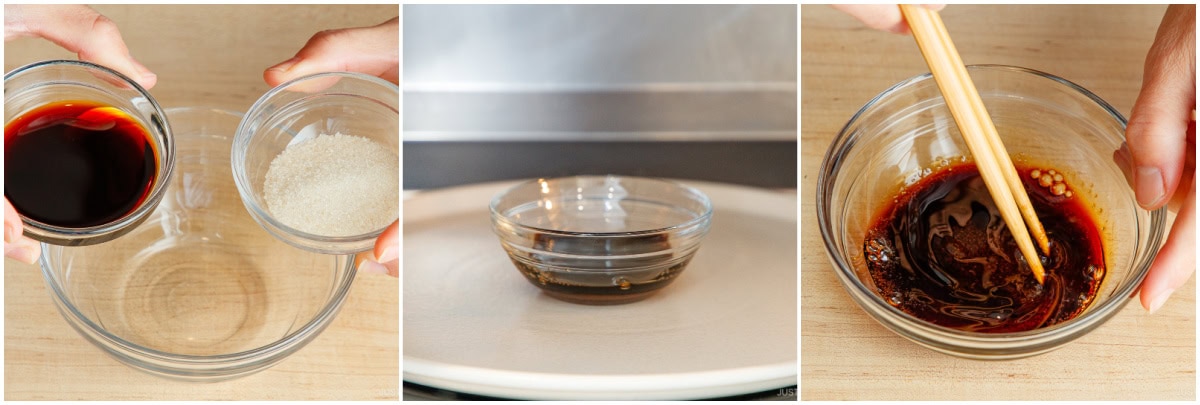
To Make the Sweet Soy Sauce
- Combine 2 Tbsp soy sauce and 1 Tbsp sugar in a microwave-safe bowl. Microwave it briefly until the sugar melts. Stir to dissolve and set aside.
![Isobeyaki Mochi 1]()
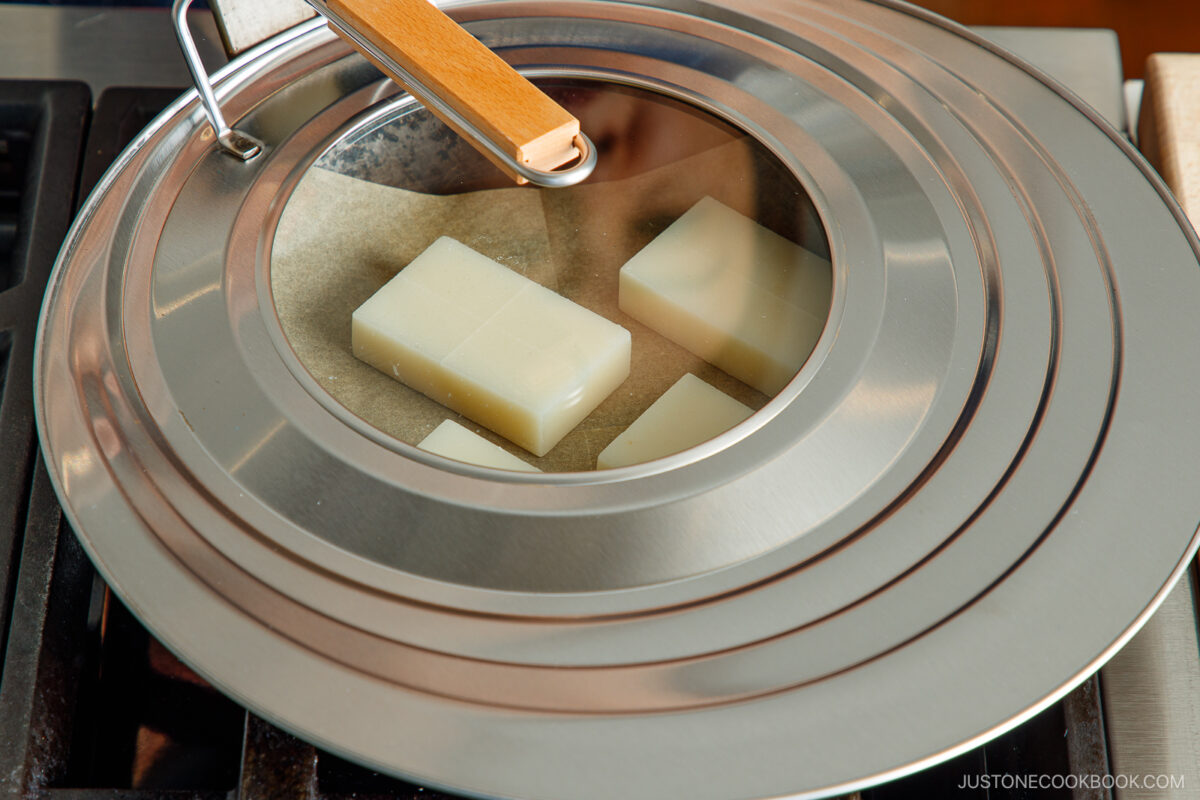
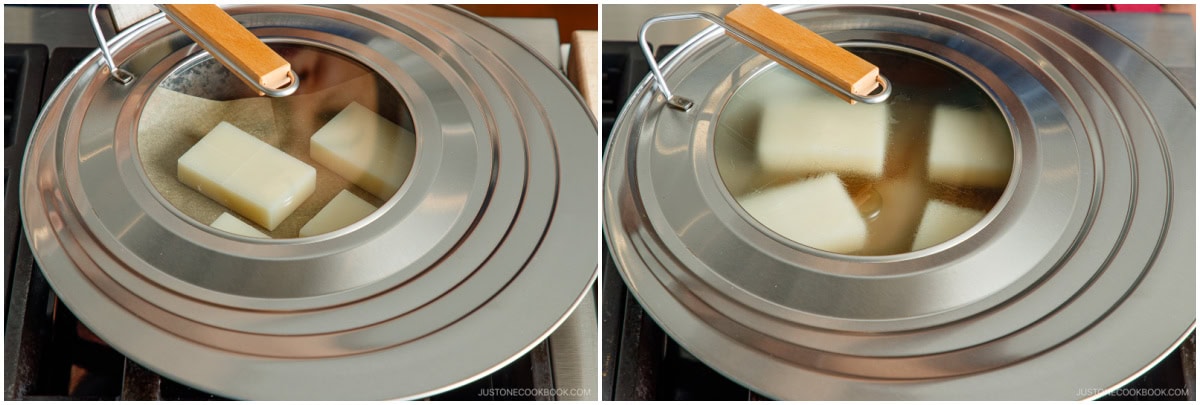
To Grill and Toast the Mochi
- Place a sheet of parchment paper in a cold frying pan. Evenly space 4 Japanese rice cake (kiri mochi) on top.
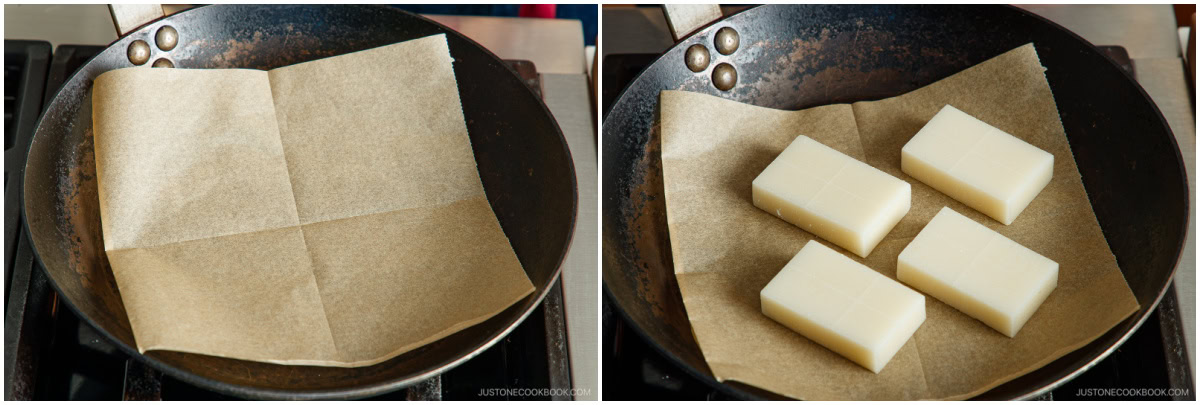
- Turn on the heat to medium-low and cover with a lid. Cook each side for about 5–6 minutes, or until it puffs up and is toasted brown. Tip: The lid is optional, but I find it helpful to use in the beginning to speed up the process and facilitate cooking. Once the mochi starts to puff, it will become too tall, so we can't cover it.
![How to Toast Mochi 2]()
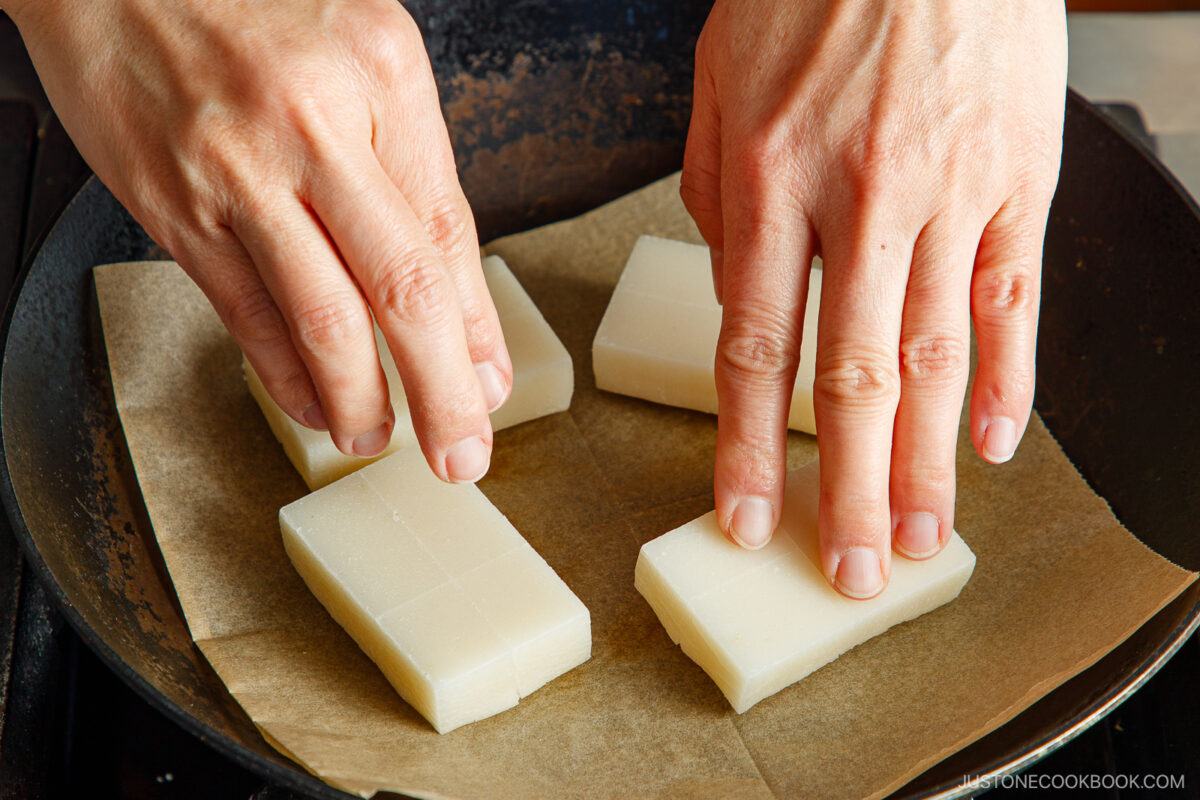
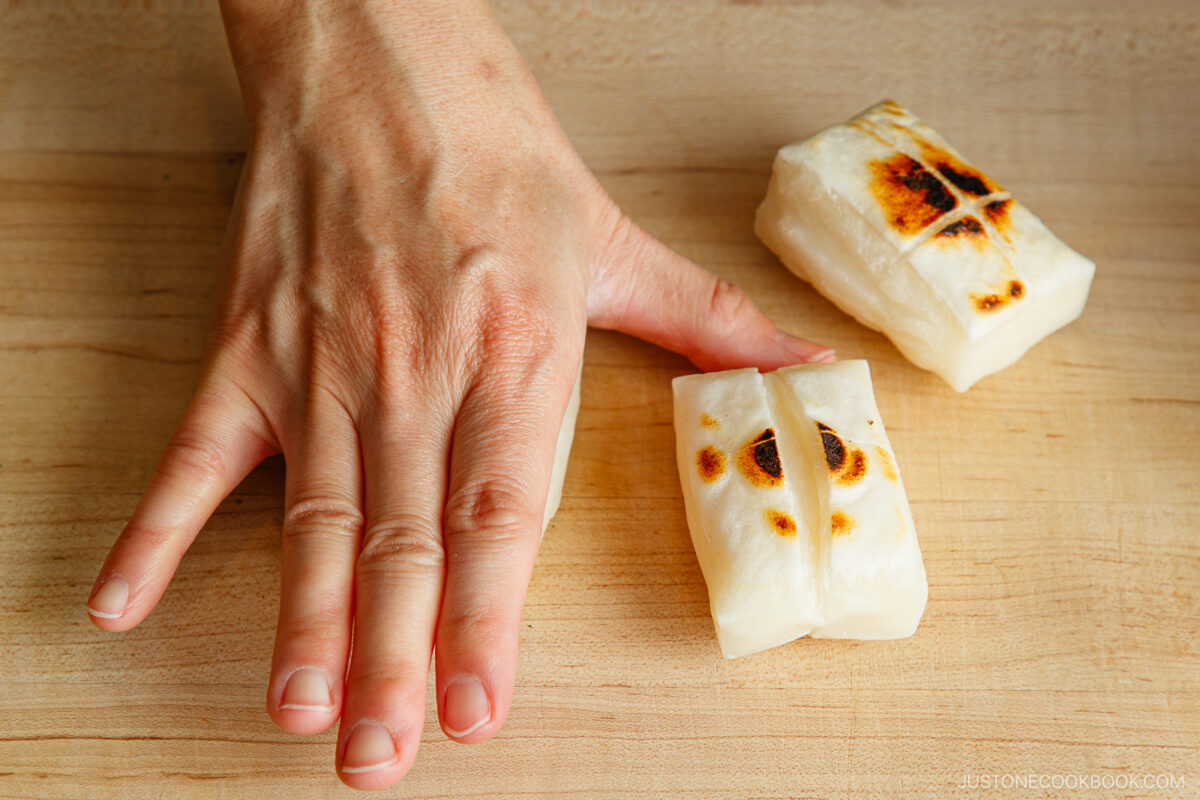
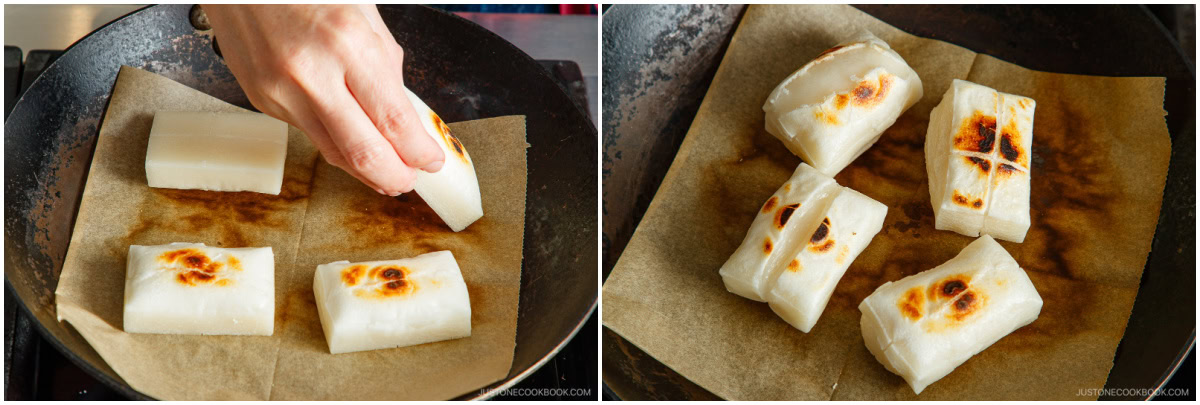
- Open the lid and check a few times. When the mochi starts to puff up, gently press them down with your fingers once, so they have a nice toasted mark on the bottom surface.
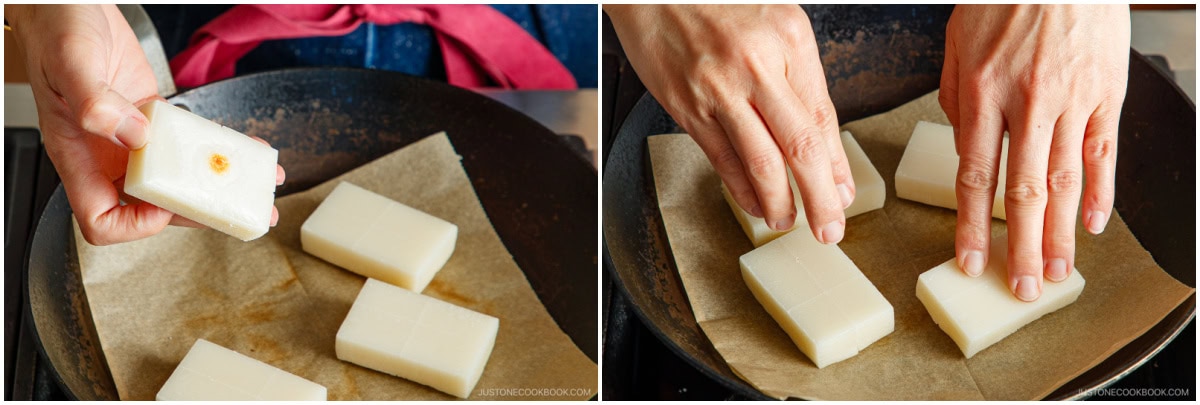
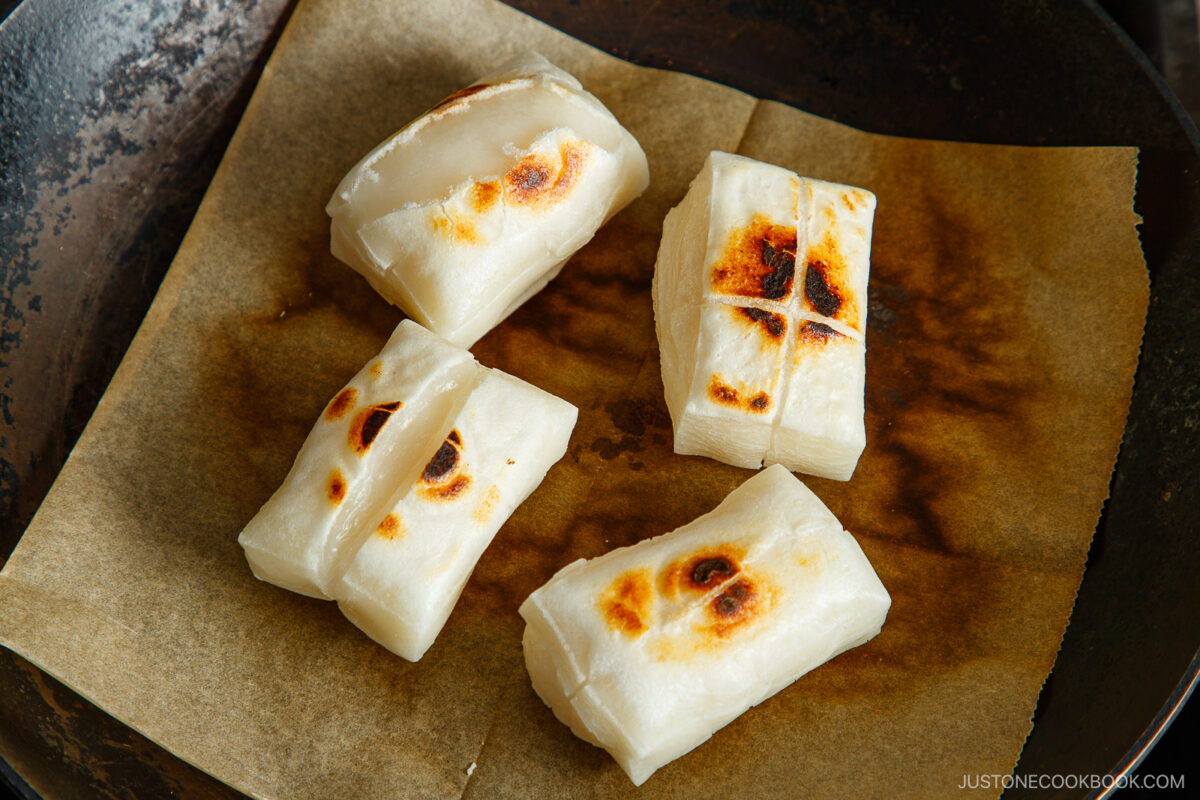
- Once browned, flip it over and toast the other side for 5–6 minutes or until puffed and browned. Again, gently press it down in the beginning for even browning. Once puffed and soft in the middle, transfer to a plate.
![How to Toast Mochi 4]()
To Make the Isobeyaki
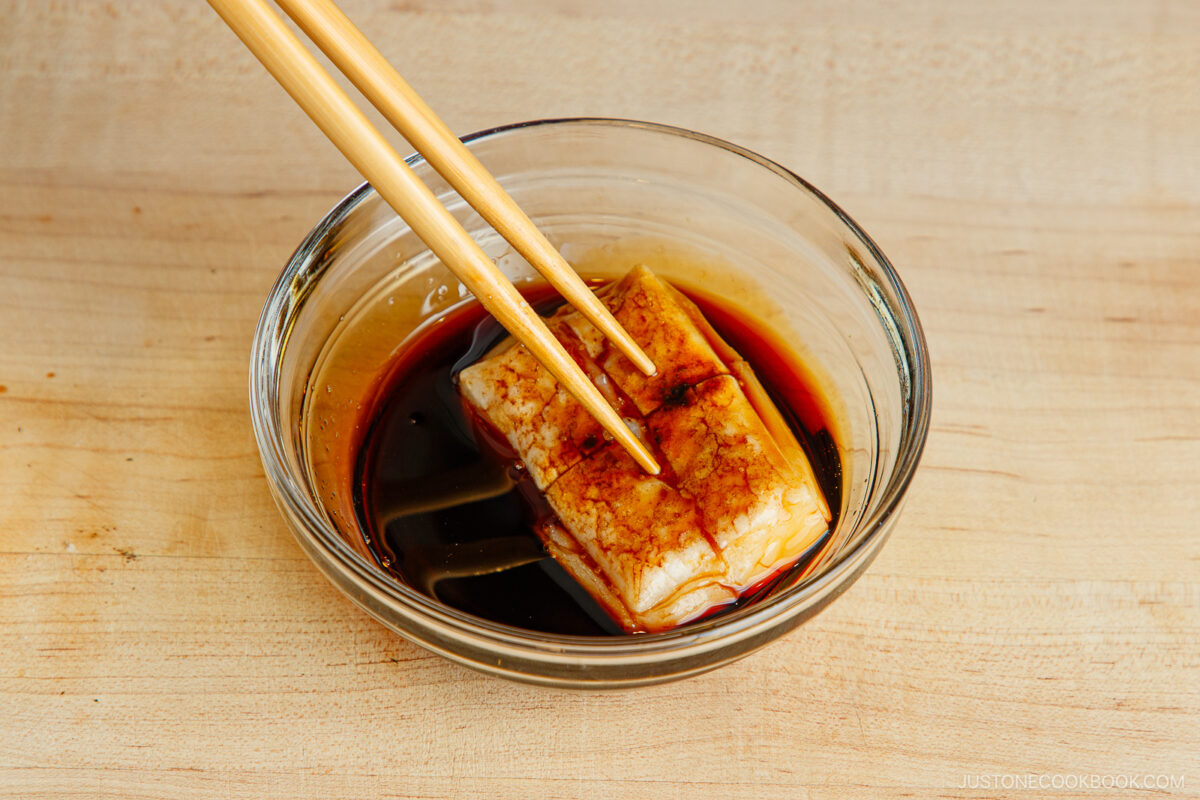
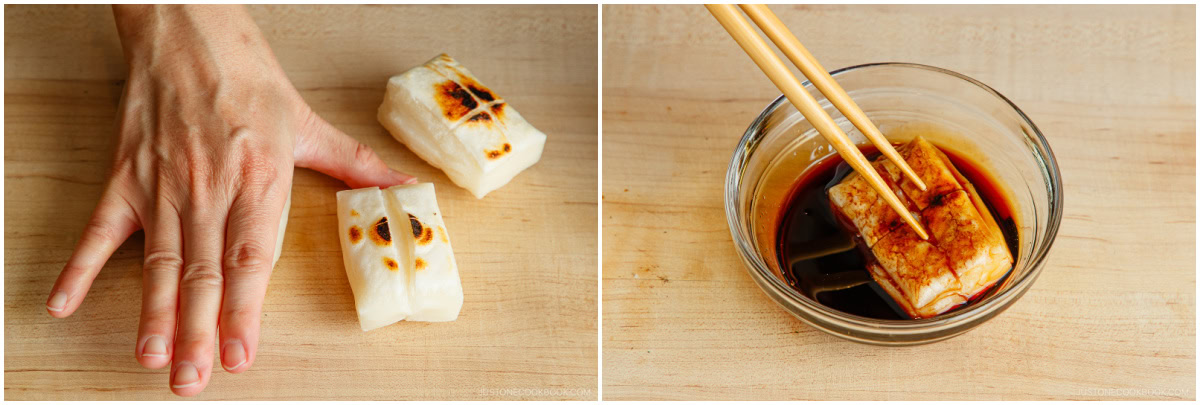
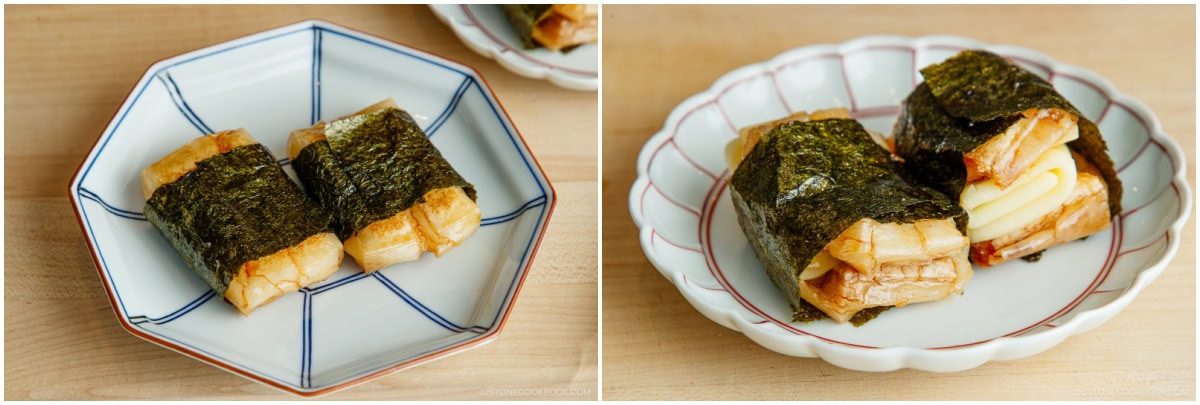
- The classic version: Press down on the puffed mochi with your hand to flatten it. Then, roll it in the sweet soy sauce to coat completely. Wrap it with nori (dried laver seaweed). Tip: I typically use two pieces of ajitsuke nori per mochi.
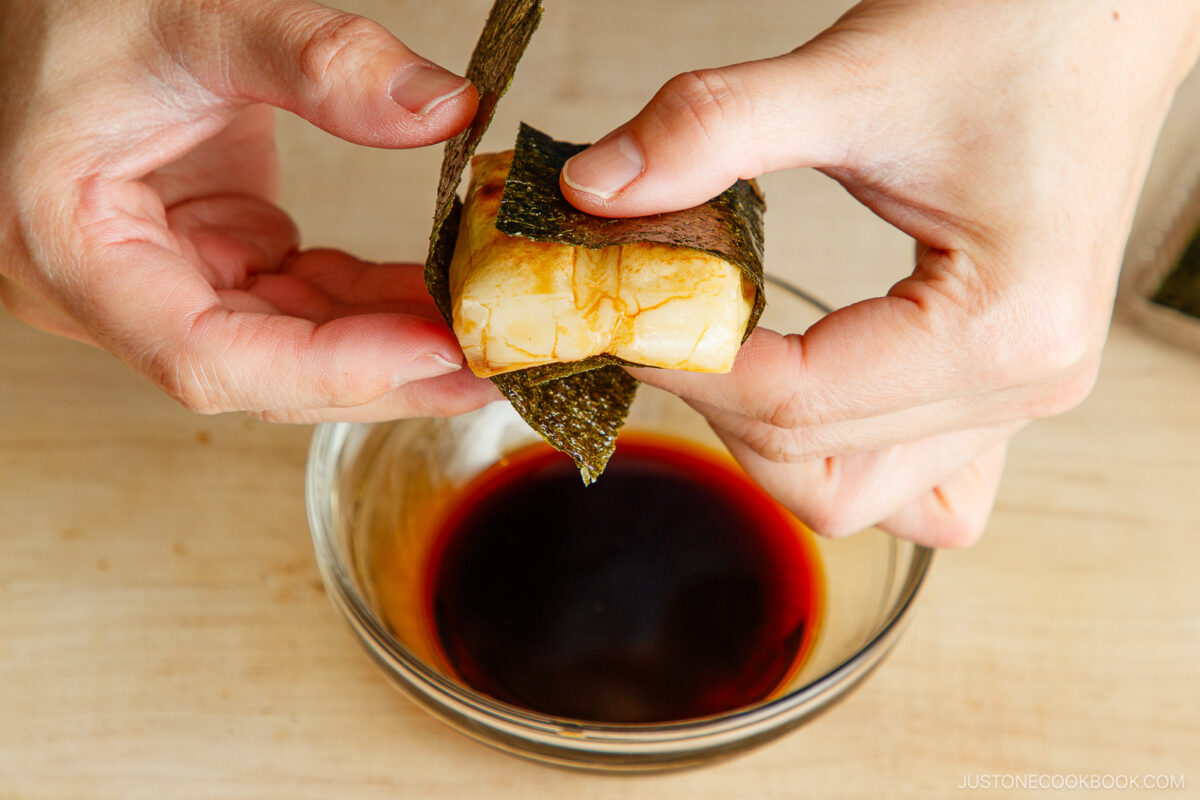
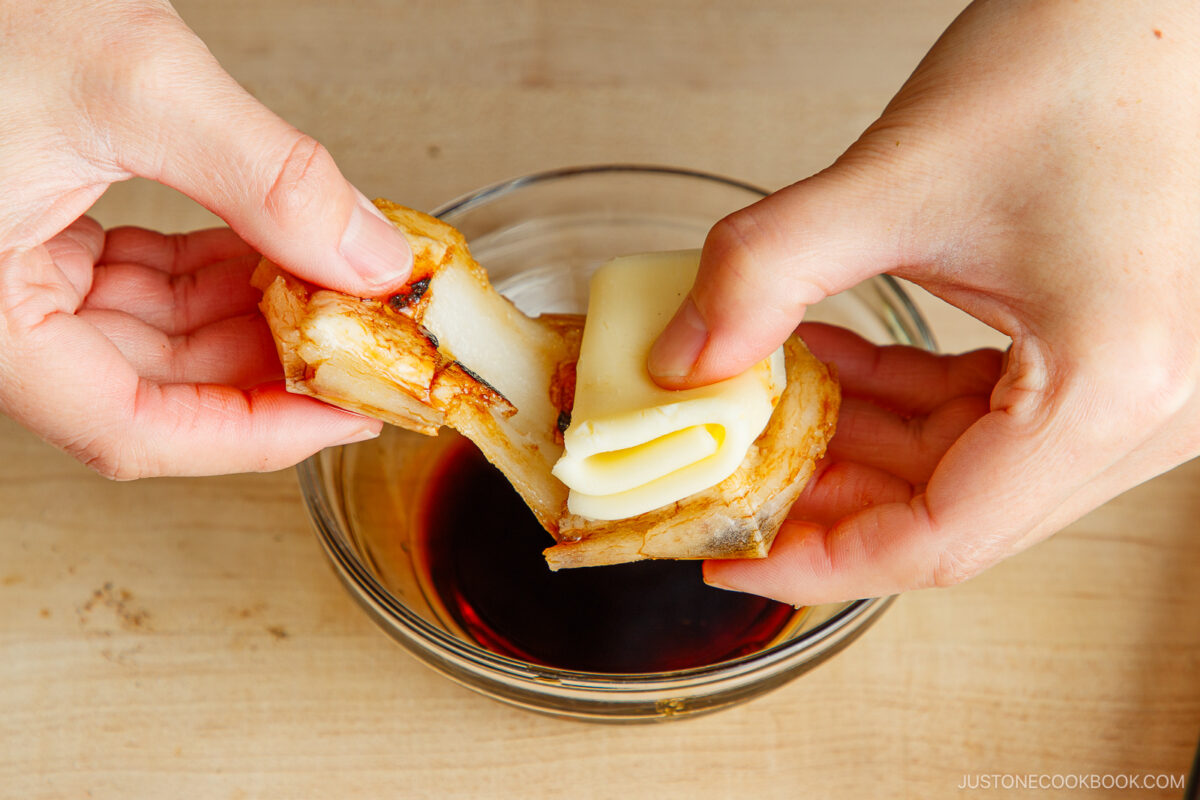
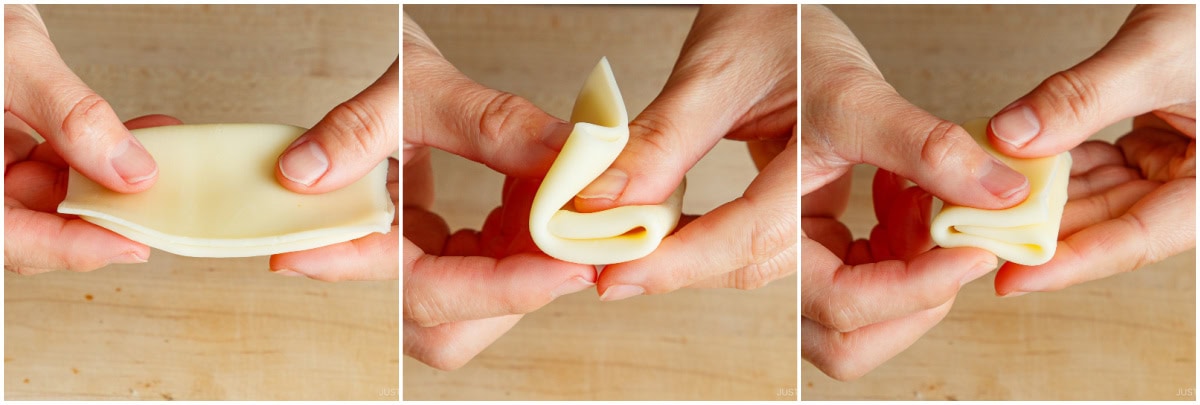
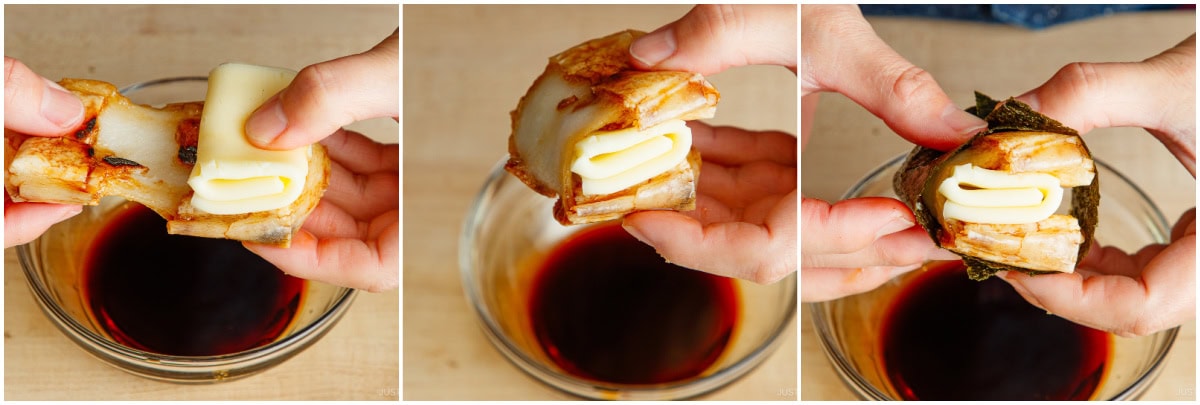
- My family's version with cheese: Cut 2 slices cheese in half. Fold them in thirds.
![Isobeyaki Mochi 4]()
- Use your hand to press down and flatten the puffed mochi. Then, roll it in the sweet soy sauce to coat completely. Then, pull apart the mochi to extend it.

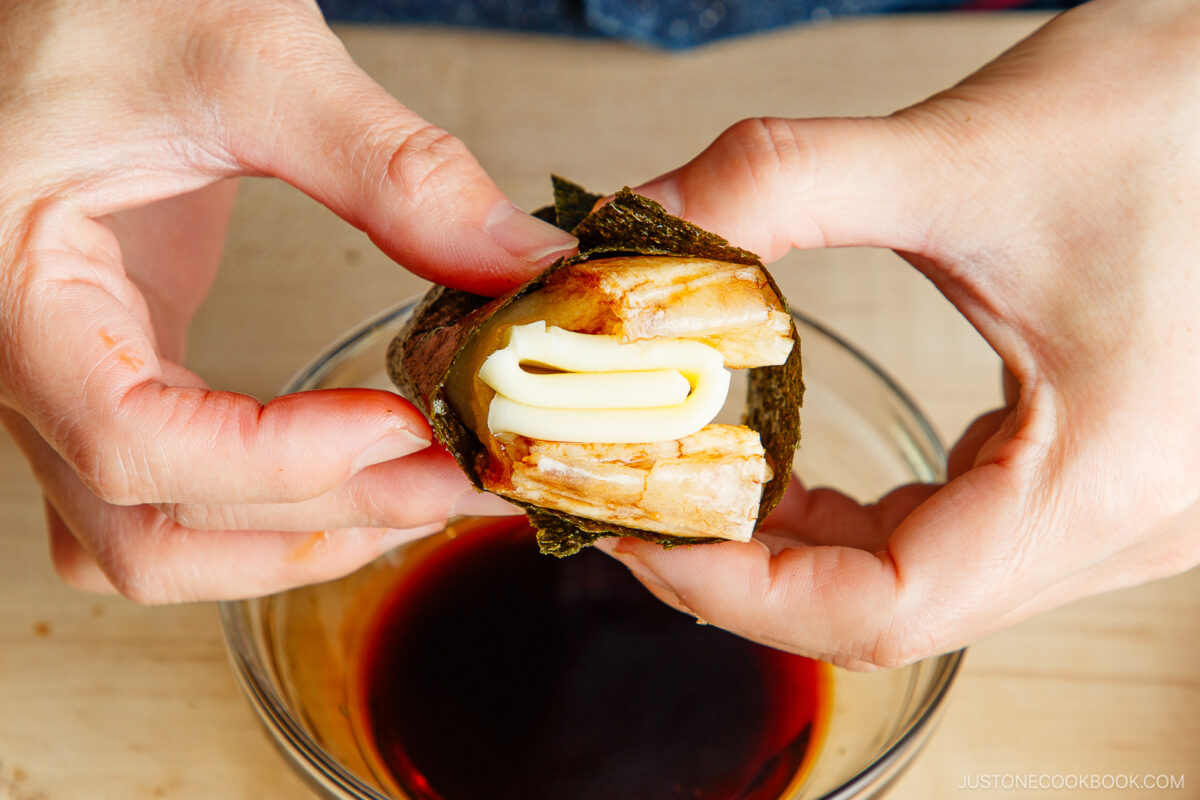
- Place the cheese inside and fold the mochi over it to cover. Wrap it with nori (dried laver seaweed).
![Isobeyaki Mochi 6]()
To Serve
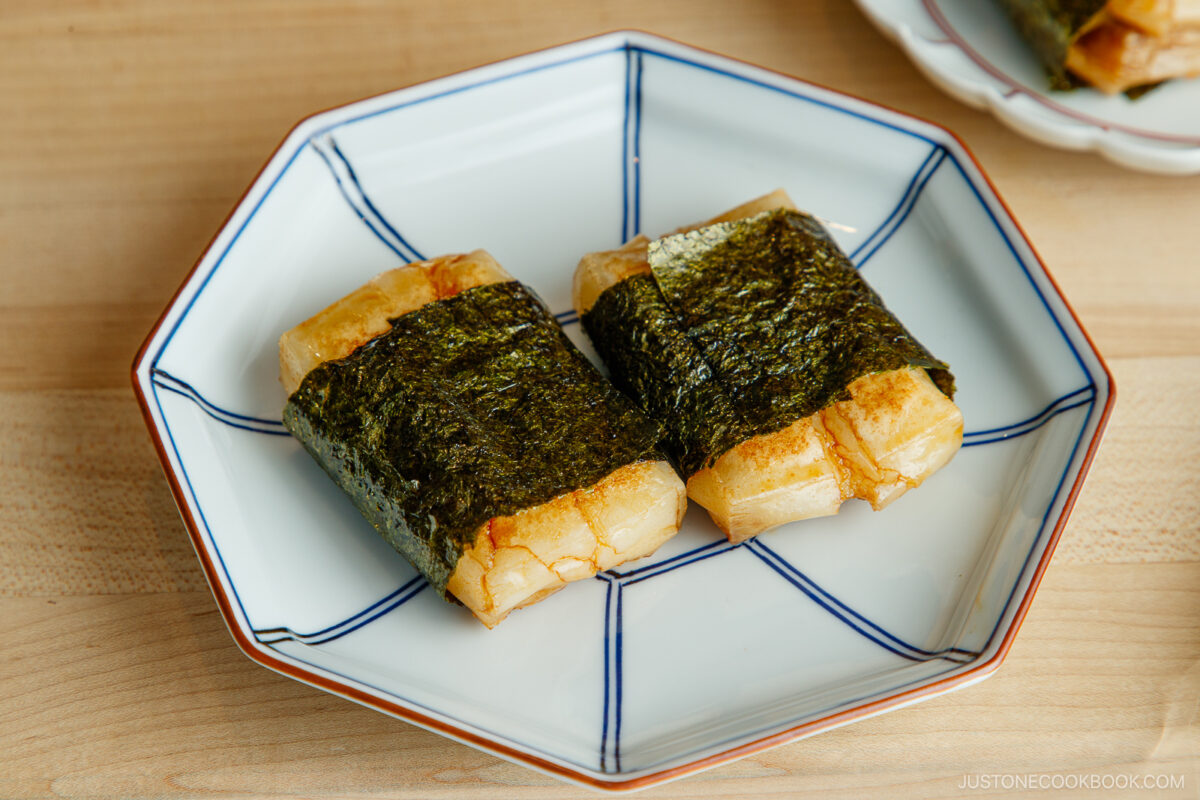
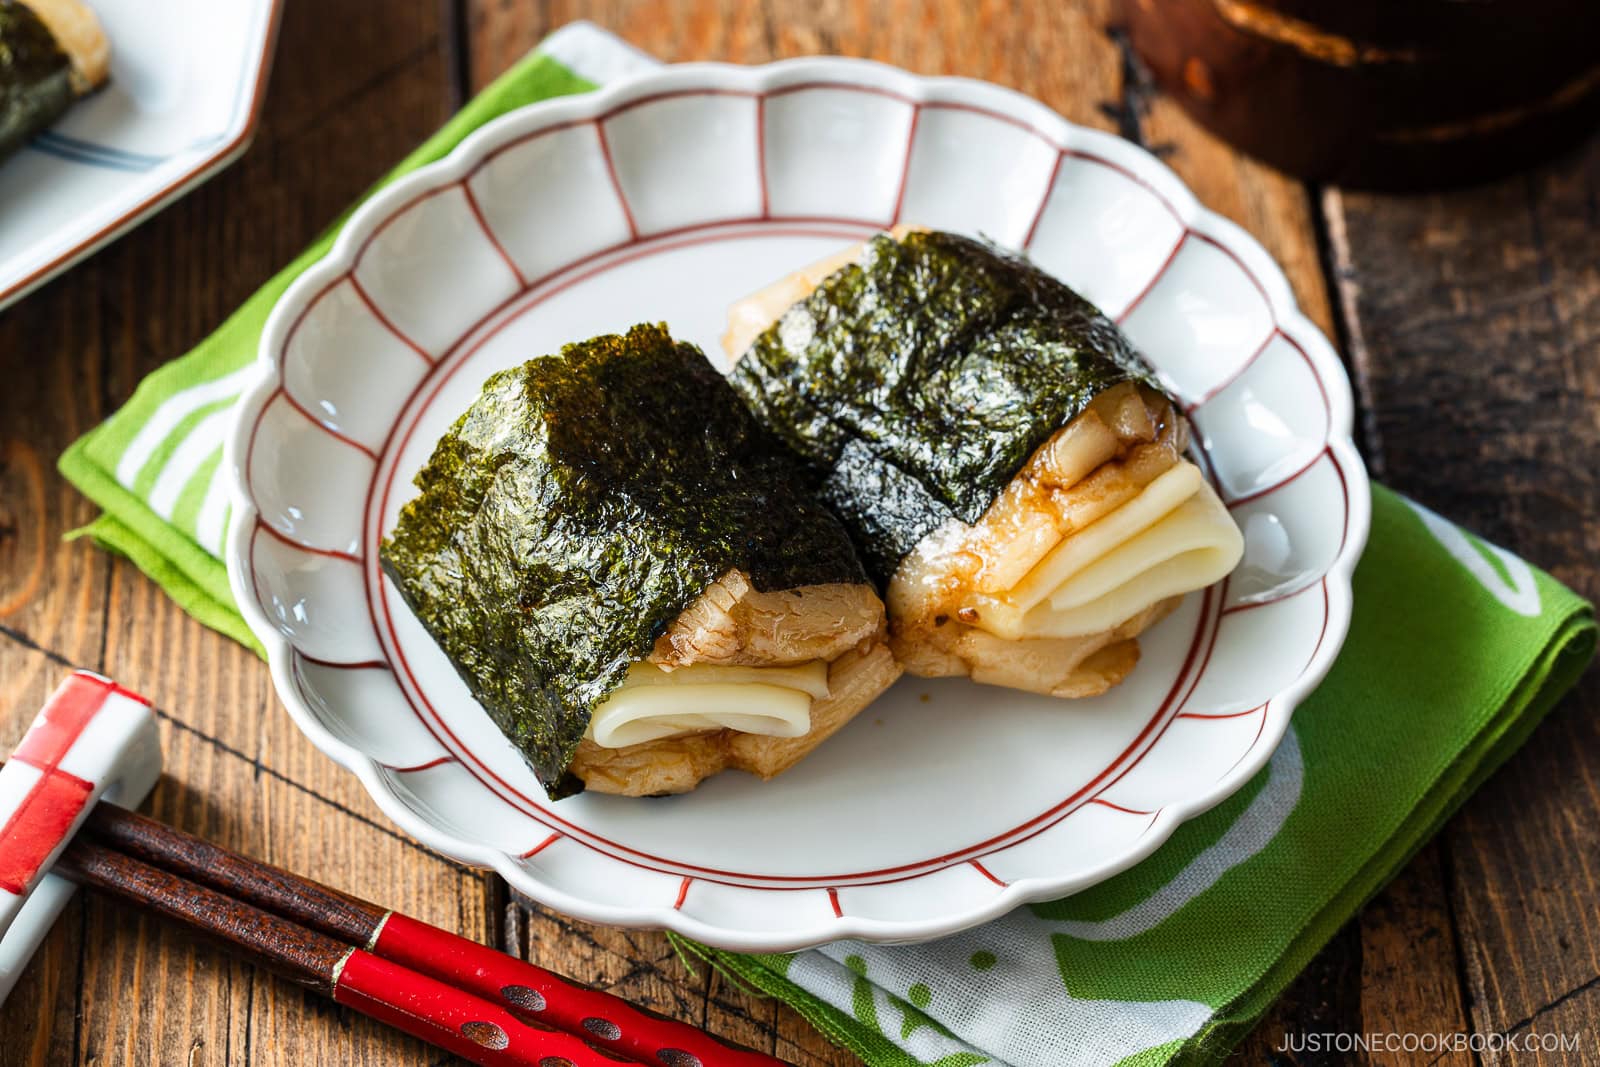
- Serve immediately with chopsticks and enjoy!
To Store
- It’s best to cook the mochi right before you serve it, as it will harden as it cools. I recommend preparing only as much as you can consume.
Course: SnackCuisine: JapaneseKeyword: mochi ©JustOneCookbook.com Content and photographs are copyright protected. Sharing of this recipe is both encouraged and appreciated. Copying and/or pasting full recipes to any website or social media is strictly prohibited. Please view my photo use policy here.